Extra Sale 10% off

Menu
Shopping Cart
Close

Using a Roller Banner Template for Fast, Professional Designs

Last‑minute event, tight budget and no time for reprints? A correctly sized roller banner template can turn a rushed job into a reliable, professional result, even if you are not a full‑time designer.

Using a roller banner template removes guesswork around bleed, safe areas and hardware visibility, which commonly cause expensive reprints. When a printer provides a template matched to their cassette system, every millimetre of visible area and leader strip is already mapped, so you can focus on layout and messaging instead of technical margins.

A well‑built roller banner template also speeds collaboration. Team members can drop in approved logos, brand colours and images without repeatedly checking dimensions. Because the file already matches a standard roller banner size, you avoid resizing artwork at the last minute, which often introduces pixelation, misaligned text and colour shifts during export.

Templates further reduce pre‑press queries. When bleed, resolution and colour mode are embedded, printers can push your job straight into production. That means faster turnaround, fewer correction emails and predictable results, especially critical when you are preparing multiple roller banners for trade shows, conferences or in‑store promotions.

Finally, once you have one successful layout built on a roller banner template, you can duplicate and retheme it in minutes. Swapping product images or headlines while retaining structure lets you roll out an entire campaign of banners for different locations, while maintaining consistent branding and reliable print performance.

1
roller banner template

What Is a Roller Banner Template and Why Use One?

What Is a Roller Banner Template and Why Use One?

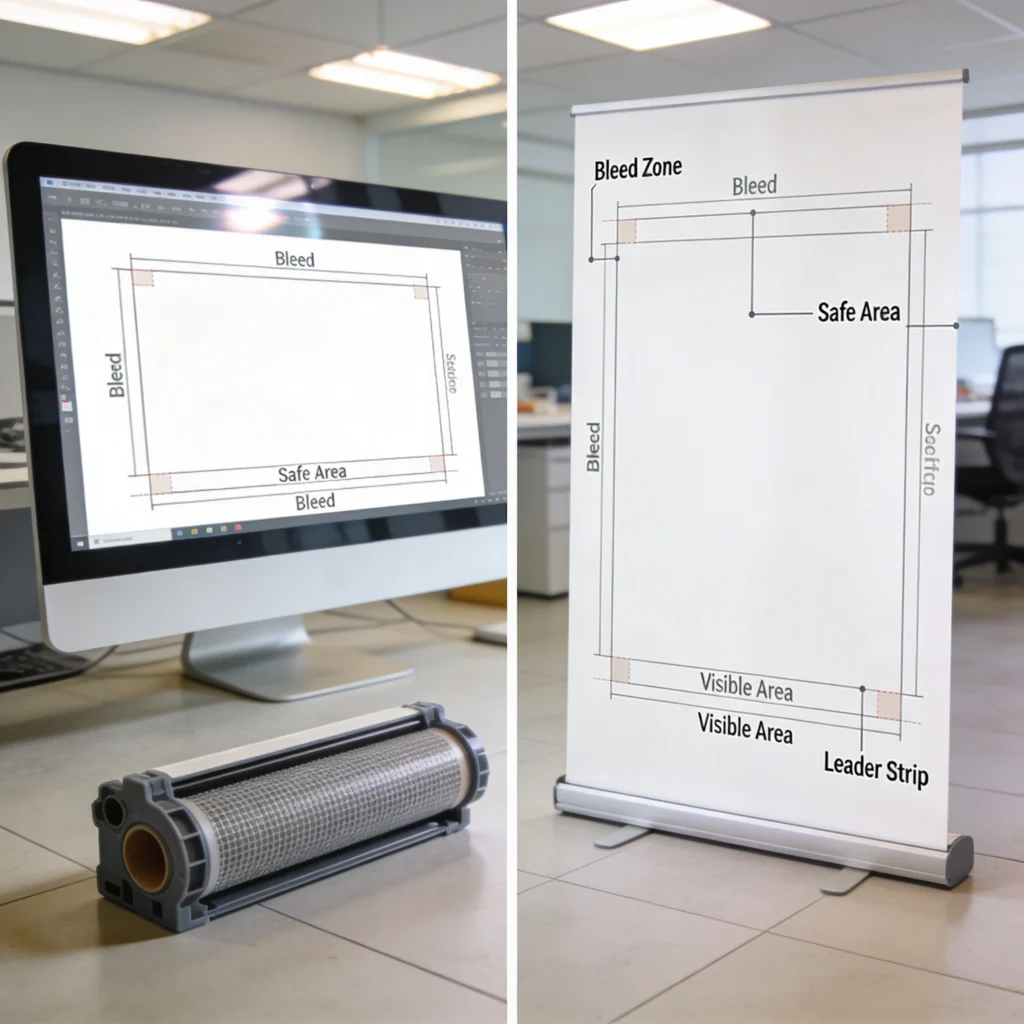
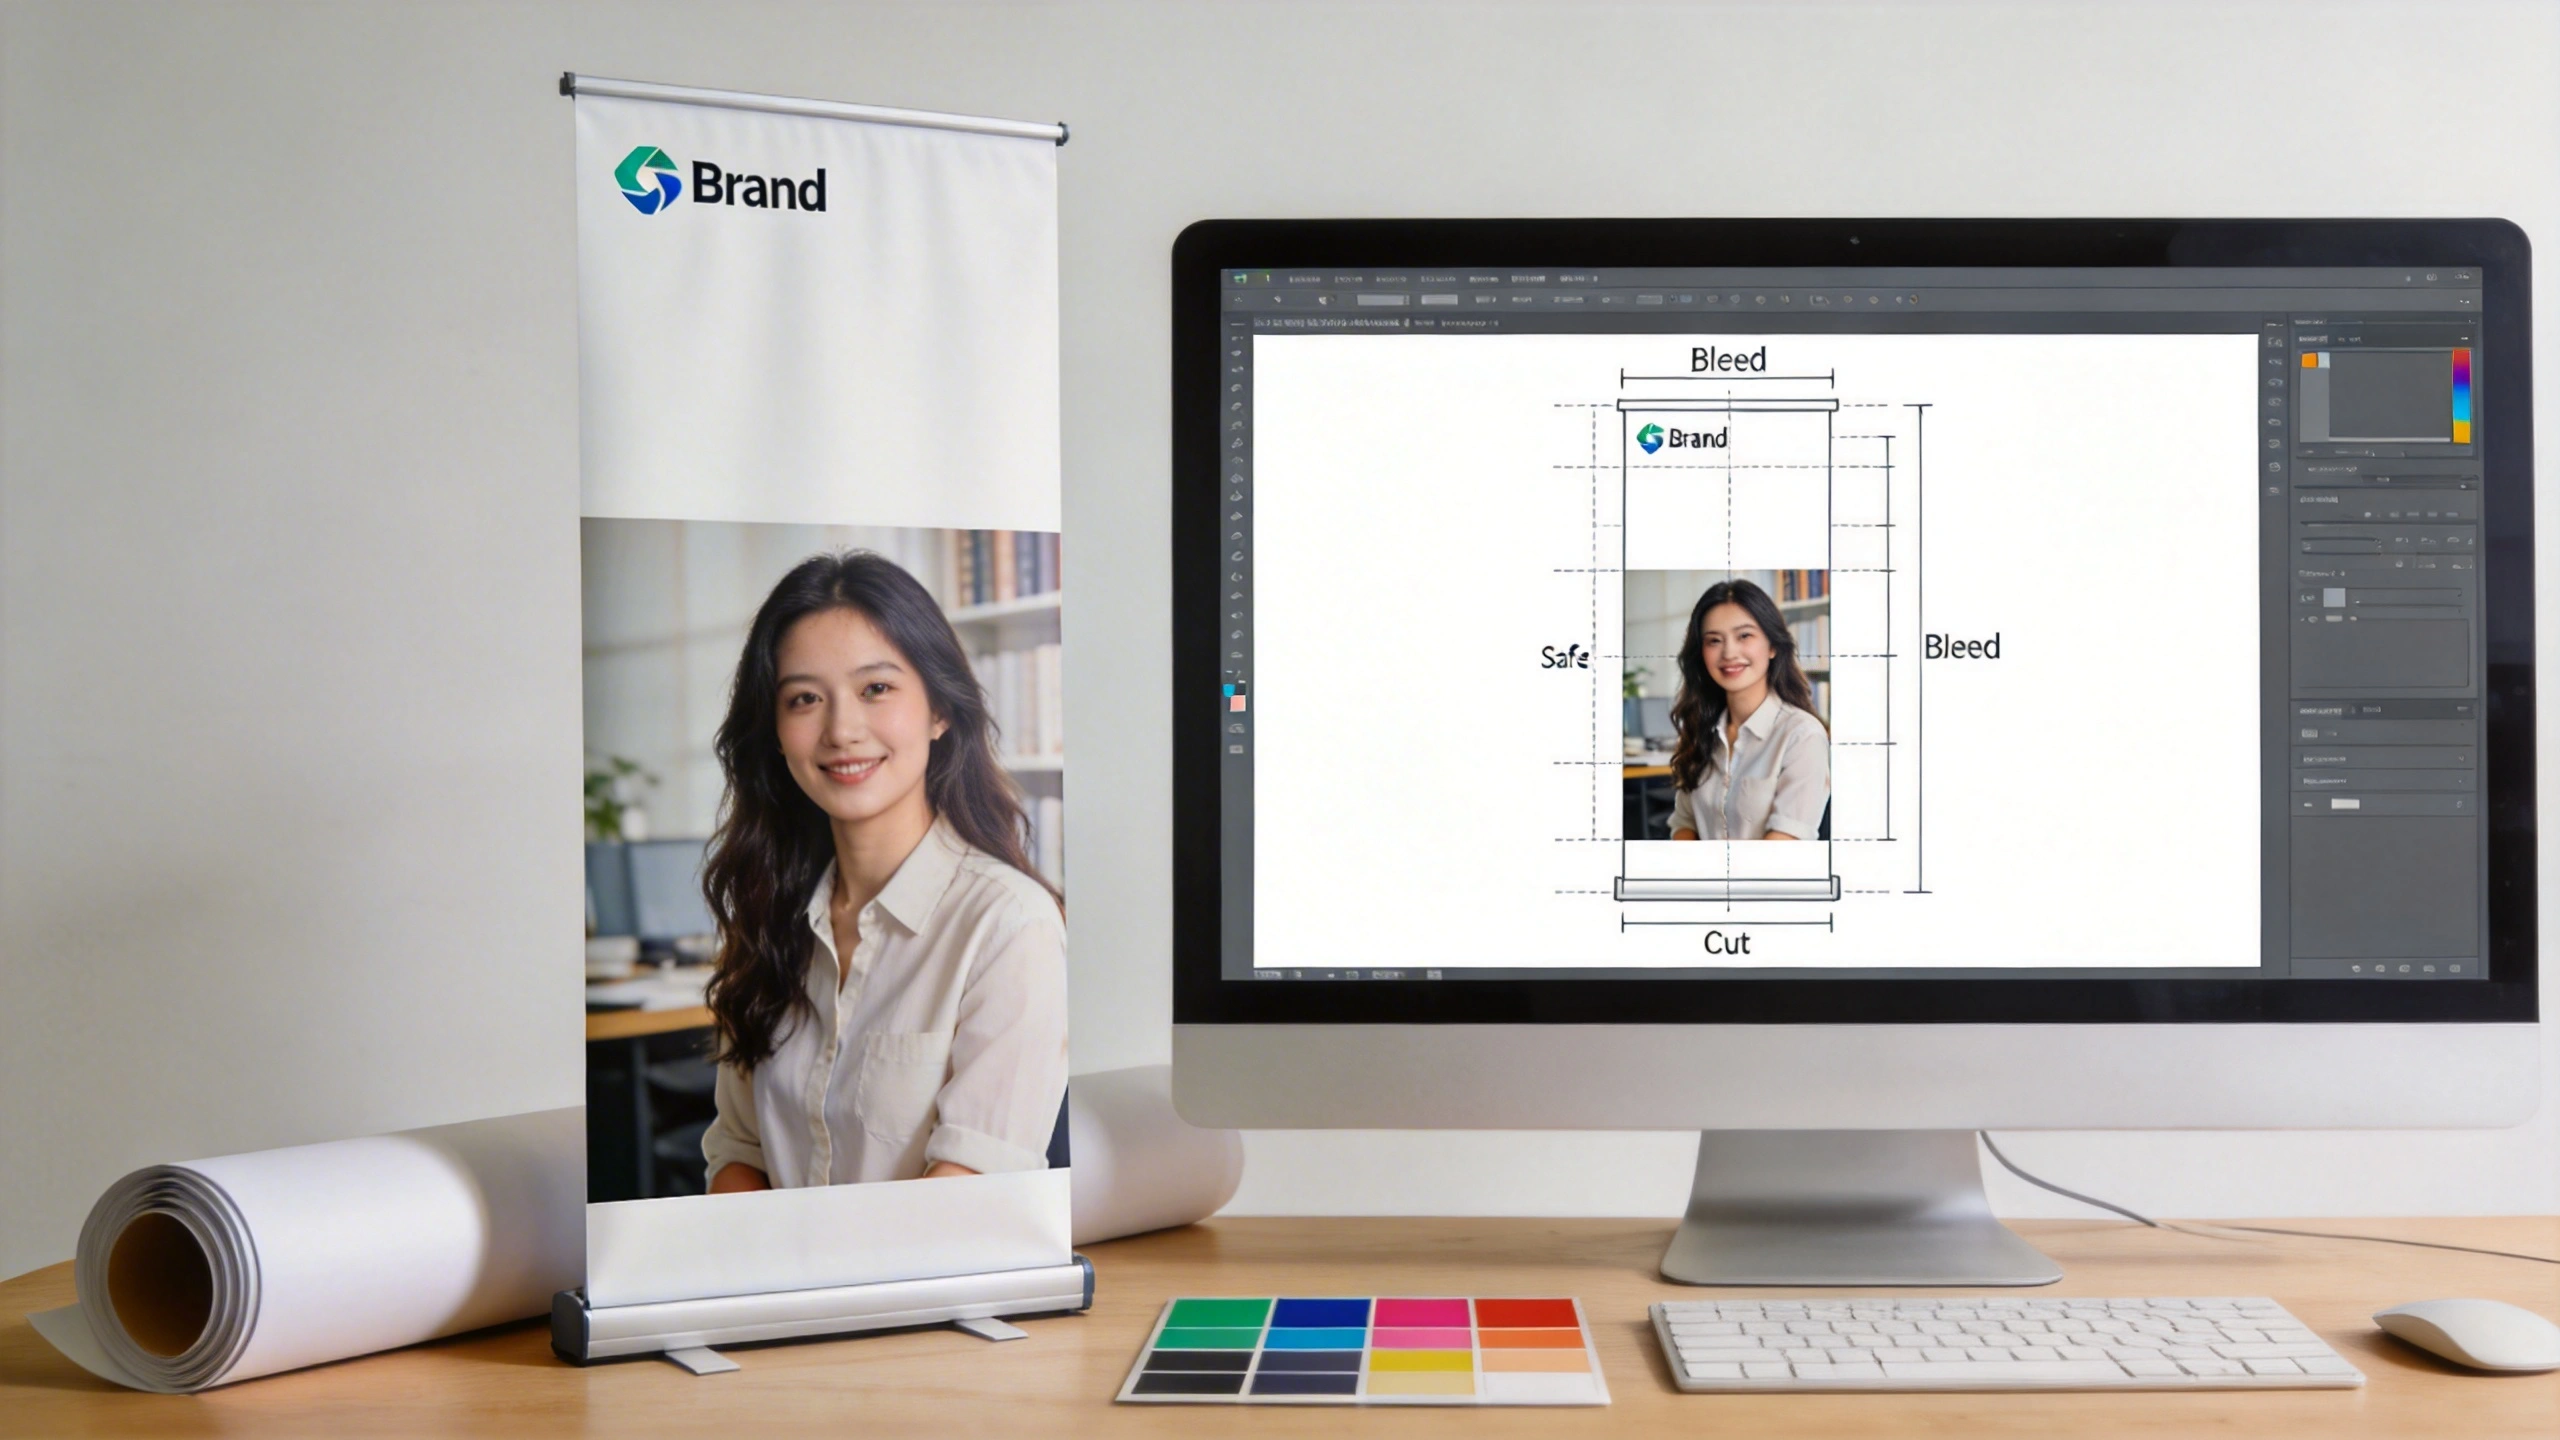
A roller banner template acts as a technical map of your display, showing exactly which areas will be visible once the graphic is installed in the cassette. By following the marked bleed, safe zones and leader strip, you minimise the risk of cropped logos, hidden headlines or awkward gaps at the base.

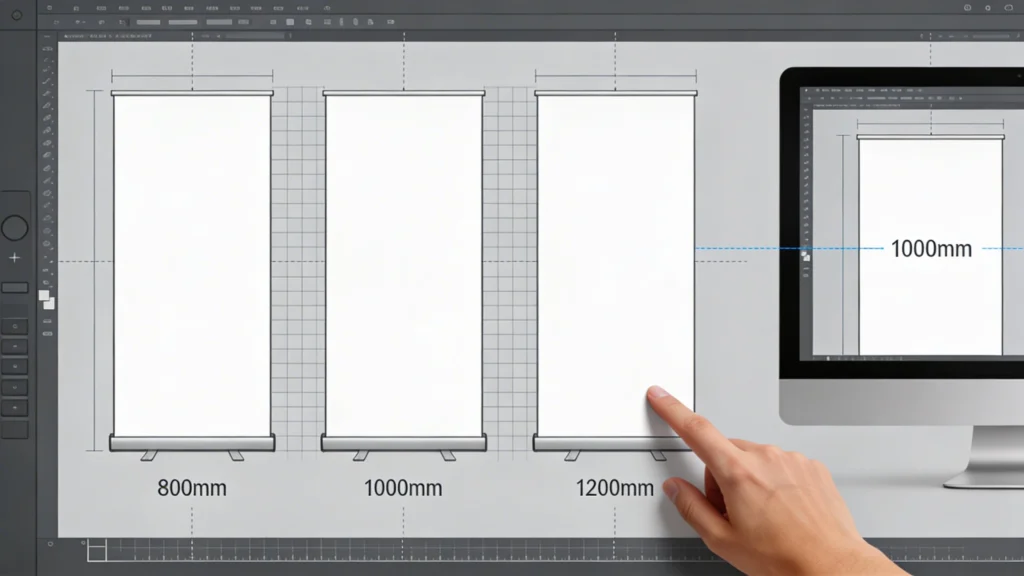
A roller banner template is a pre‑sized design file that matches a physical roll up banner system, including bleed, trim and hidden areas. It usually comes as an Illustrator, InDesign, PDF or Canva file. By mirroring the exact hardware dimensions, it ensures your artwork sits correctly once the banner is pulled from the cassette and tensioned.

Core Elements Inside a Roller Banner Template

Most templates contain three critical zones: visible graphic area, bleed and a non‑visible leader strip. For example, a 2000mm high banner might show 2000mm of artwork but include 100mm extra at the bottom for the mechanism. Clear guides mark safe zones, so text sits at least 50mm from edges, minimising the risk of trimming headlines or logos during finishing.

Why Templates Help Designers and Non‑Designers

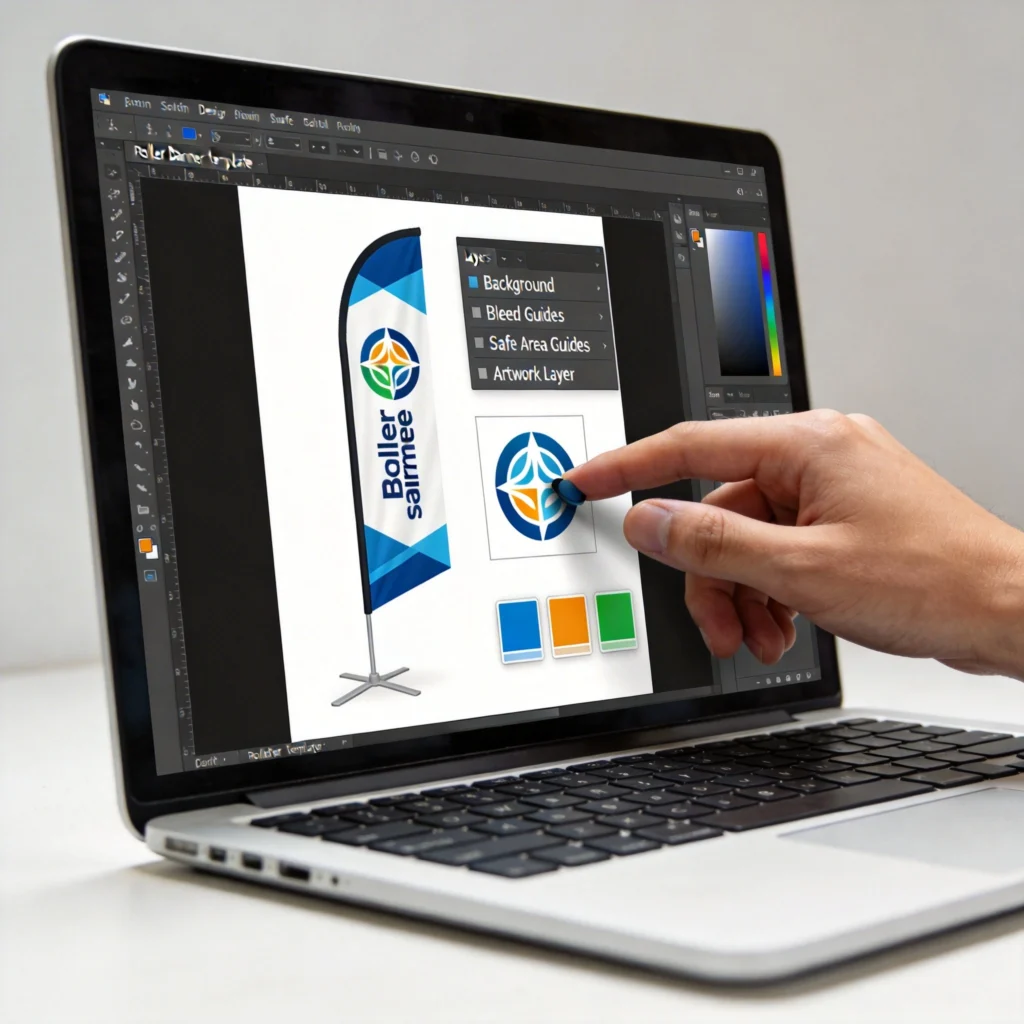
For experienced designers, templates eliminate repetitive setup, letting them jump straight into creative decisions. Non‑designers benefit even more because they do not need to understand print jargon like bleed, CMYK or overprint. The template enforces those settings automatically, so dragging in a 300dpi image and aligned logo is usually enough to achieve a production‑ready roller banner file.

2

Choosing the Right Roller Banner Template for Standard Sizes

Selecting a roller banner template that matches a standard roller banner size from your printer prevents scaling issues and blurred graphics. UK suppliers frequently offer 800mm, 850mm and 1000mm widths, all with around 2000mm height. Downloading the exact template from the printer’s website means your artwork will align precisely with their hardware and finishing equipment.

Choosing the Right Roller Banner Template for Standard Sizes

Design best practices become easier to apply when you use a roller banner template as a structural framework. With the viewing area clearly defined, you can place headlines at eye level, keep key messages away from edges, and maintain consistent spacing. This structure supports clear hierarchy, legibility and strong, on‑brand visuals.

Comparing Standard Roller Banner Size Options

Before designing, compare the available formats and how they suit your content density and viewing distance. The table below shows common UK sizes and how they work in real venues like shell scheme stands, retail aisles and reception areas. Paying attention to width and visible area helps you select a template that fits your space and message length.

Banner Size (W×H) Typical Visible Area Best Viewing Distance Common UK Use Case Recommended Template File Size
800×2000mm 800×2000mm 1.5–3m Small exhibitions, narrow retail aisles 800×2100mm including 100mm bleed/leader
850×2000mm 850×2000mm 1.5–3m General trade shows, offices 850×2100mm including 100mm bleed/leader
1000×2000mm 1000×2000mm 2–4m Backdrops, reception entrances 1000×2100mm including 100mm bleed/leader
1200×2150mm 1200×2100mm 2–5m Conference stages, photo backdrops 1200×2250mm including 150mm bleed/leader
1500×2150mm 1500×2100mm 3–6m Press walls, event branding 1500×2250mm including 150mm bleed/leader
2000×2150mm 2000×2100mm 3–7m Wide roller banners as backdrops 2000×2250mm including 150mm bleed/leader

Once you have chosen a standard roller banner size, always download the matching template from your specific printer, not a generic source. Different manufacturers hide slightly different amounts of material inside the cassette, so a 100mm leader on one system might be 120mm on another. Aligning to the printer’s file avoids cropped logos or unexpected white bands at the base.

3

Setting Up Your Design Software with a Roller Banner Template

Setting Up Your Design Software with a Roller Banner Template

Once your roller banner template is loaded into your design software, you can lock the technical guide layers and work freely on top. Dropping in approved logos, brand colours and imagery becomes faster because the document is already set up. There’s no need to recreate margins, rulers or export presets for every new banner.

Importing a roller banner template correctly into your preferred design software ensures colour, resolution and scale remain accurate from the first draft. Most UK printers supply templates in Adobe Illustrator, InDesign and sometimes layered PDFs. Canva users usually work from custom dimensions, recreating the supplied size and bleed inside the online editor.

Configuring Templates in Illustrator, InDesign and Canva

In Illustrator, open the supplied AI or PDF, confirm the document colour mode is CMYK and raster effects are set to 300ppi. InDesign users should place the PDF template on a locked layer, then build artwork above it. Canva requires manual entry of dimensions in millimetres, then adding a 3–5mm bleed using its print settings where available.

Ensuring Accurate Scale and Linked Assets

Whichever program you use, verify that the template’s rulers show millimetres and that the final height matches the printer’s specification exactly. When placing images, check they are at least 300dpi at full size. Store linked assets in a single project folder, so packaging or exporting the artwork for your printer preserves every element without missing fonts or low‑resolution previews.

4

Design Best Practices When Working with a Roller Banner Template

Designing within a roller banner template requires different thinking from A4 leaflets because viewers often stand two to four metres away. Large type, strong contrast and a clear hierarchy beat dense text every time. Using the template’s safe zones and guides, you can place critical messages where they remain visible above furniture, crowds and roller mechanisms.

Design Best Practices When Working with a Roller Banner Template

Choosing the right roller banner template starts with matching the printer’s standard sizes. Working with pre‑set dimensions for popular widths ensures your artwork scales correctly and aligns with the cassette hardware. This avoids stretching images or reworking layouts at the last minute, which often leads to pixelation and misaligned text.

Layout and Messaging Priorities

Start by defining a single primary message, such as a product benefit or event hook, and place it around eye level, typically 1400–1600mm from the base. Use type sizes of 120pt or larger for main headlines on an 800mm wide banner. Supporting details like bullet points or URLs can sit lower, but keep body copy under 30–40 words to maintain legibility.

Branding, Colour and Image Choices

Apply brand colours in large fields rather than thin lines, ensuring at least 70% contrast between text and background for readability. Choose images at 150–300dpi at final size, avoiding smartphone screenshots or compressed web graphics. Align logos within the safe area at the top or bottom, leaving at least 50mm breathing space from edges defined in the roller banner template.

5
wide roller banners

Adapting a Roller Banner Template for Wide Roller Banners

Wide roller banners, often 1200–2000mm wide, demand more than simply stretching a narrow layout. When adapting a standard roller banner template, you must maintain proportions for text and imagery while redistributing content horizontally. This prevents distorted logos, pixelated photos and awkward empty spaces that weaken impact across a broader field of view.

Adapting a Roller Banner Template for Wide Roller Banners

Key Adjustments for Wide Roller Banners

Rather than scaling everything, anchor your main message column at the original width, then extend background colours or patterns sideways. Introduce secondary content zones, such as product ranges or partner logos, into the additional width. Maintain original type sizes from the standard template so legibility at three to five metres remains consistent, even as the banner becomes physically wider.

  • Duplicate the original 800mm layout centrally, then extend side panels for imagery or gradients without shrinking main text.
  • Use the extra width for horizontal photo strips, showing product variations at 200–300mm wide each, evenly spaced.
  • Place secondary logos or sponsor badges in side columns, keeping at least 40mm margin from outer edges.
  • Keep key calls to action within the original central column, ensuring visibility even when partially obstructed by crowds.
  • Check total file width in millimetres matches the wide roller banner template from your printer exactly before exporting.
6

Exporting Print-Ready Files from Your Roller Banner Template

Exporting Print-Ready Files from Your Roller Banner Template

Exporting correctly from your roller banner template is where many otherwise strong designs fail. A file that looks sharp on screen can print fuzzy or mis‑coloured if you ignore bleed, colour profiles and compression. Taking three to five minutes to configure export settings ensures the printer receives artwork that drops straight into their RIP software without manual fixes.

Recommended Export Settings for Roller Banners

Most UK wide‑format printers prefer PDF/X‑1a or PDF/X‑4 files in CMYK, with 3–5mm bleed and no crop marks intruding into the visible area. Set image downsampling to 300dpi for colour and grayscale, and avoid JPEG compression below 8/10 quality. Embed or outline fonts to prevent substitution, and include the printer’s specified ICC profile, such as FOGRA39, where requested.

  • Export at full banner size plus bleed; never scale to A4 for proofing without sending the full‑size file as well.
  • Disable RGB colour spaces; convert spot colours to CMYK unless your printer explicitly supports spot inks on banners.
  • Flatten transparency where possible, reducing RIP processing time and avoiding unexpected drop shadow artefacts.
  • Check file size; 100–300MB is typical for a detailed banner, avoiding over‑compressed images under 5MB total.
  • Use the printer’s pre‑flight checklist or online uploader to validate resolution, bleed and colour mode before final approval.
7
roll up banner printing

Common Template Mistakes That Affect Roll Up Banner Printing

Even with a well‑designed roller banner template, certain mistakes repeatedly cause poor roll up banner printing results. Understanding these pitfalls helps you review artwork critically before sending it to your printer. Many issues stem from ignoring the marked safe zones or altering the template dimensions, which undermines the precise engineering built into the cassette system.

Common Template Mistakes That Affect Roll Up Banner Printing

Technical Errors Inside the Template

One frequent error is deleting or resizing the non‑visible leader area at the bottom, which leads to logos disappearing into the cassette when assembled. Another is designing in RGB and letting the printer convert to CMYK automatically, which can dull bright blues and greens by 10–20%. Maintaining the original template size and colour mode prevents these avoidable surprises on delivery.

Content and Layout Problems

Overloading the banner with small text, QR codes at ankle height or critical information below 800mm from the floor makes content practically unreadable in real venues. Respect the template’s safe area and recommended viewing distances. Keep essential copy in the upper two‑thirds of the design and test legibility by printing an A4 crop at 100% to mimic on‑site viewing conditions.

By combining an accurate roller banner template, disciplined layout choices and careful export settings, you dramatically reduce reprint risk and turnaround delays. Aligning with your printer’s standard roller banner size options and adapting correctly for wide roller banners enables you to scale campaigns quickly. The result is consistent, professional roll up banner printing that reliably represents your brand across every event.

Cart