Menu
Shopping Cart
Close

Pop Up Banner Printing: How to Get Professional Results

Your pop up banner is often the first thing prospects see from several metres away, long before they speak to your team. Poor printing turns even brilliant design into something blurry, off-brand and forgettable, wasting expensive event space. Getting pop up banner printing right means controlling every step, from file setup to final delivery.

When you treat pop up banner printing as a technical process rather than an afterthought, the finished display looks sharp, consistent and genuinely professional. Resolution, colour profiles, materials and finishing all interact, so one weak decision can undermine the whole banner. By planning carefully, you avoid pixelated logos, warped text and mismatched colours that cheapen your brand presence.

Professional printers can compensate for some mistakes, but they cannot repair low‑resolution images or badly prepared artwork. Understanding how large‑format printing works lets you brief suppliers clearly, approve proofs confidently and make trade‑show‑ready pop up banners on the first attempt. The result is a portable display that works hard at every event.

Whether you’re ordering a single stand for a local expo or fifty pop up advertising banners for a national campaign, the same principles apply. Use the guidelines below as a checklist, and you’ll drastically cut reprint costs, last‑minute stress and awkward surprises when the box finally arrives at your stand.

1
pop up banner printing

Understanding Pop Up Banner Printing Basics

Understanding Pop Up Banner Printing Basics

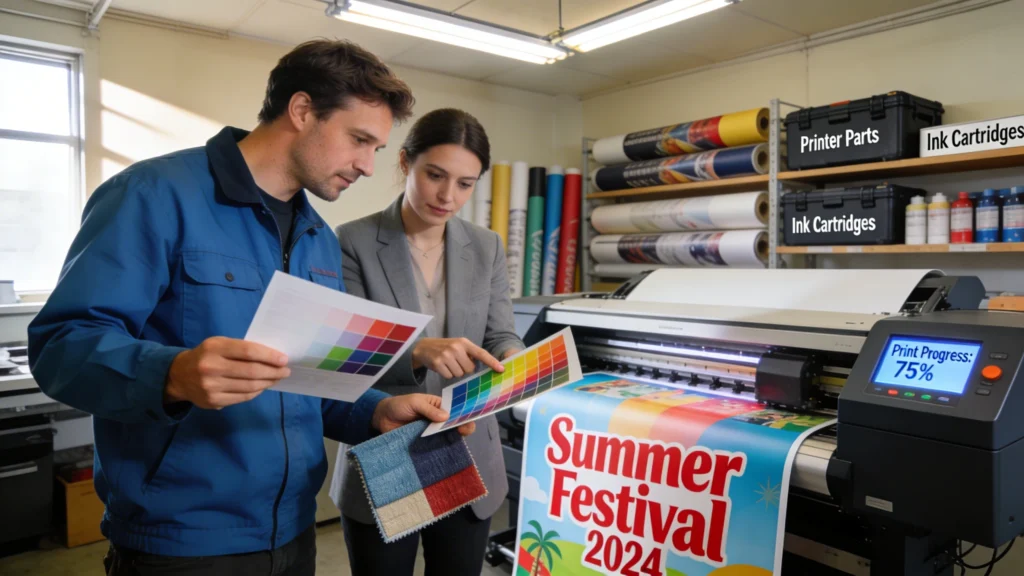
Understanding the basics of pop up banner printing starts with seeing how resolution, viewing distance and colour accuracy interact. A banner that looks fine on screen can appear pixelated or washed out at full size. Knowing the technical limits of large-format printing helps you avoid blurry text, jagged logos and disappointing colour reproduction at events.

Large‑format pop up banner printing follows the same principles as any professional print, but small oversights become very visible at two metres high. Because viewers stand 1–5 metres away, printers balance resolution, viewing distance and ink coverage to keep graphics crisp without creating huge, unmanageable files. Knowing these basics helps you choose the right specs on every order.

Resolution, Viewing Distance and Print Sharpness

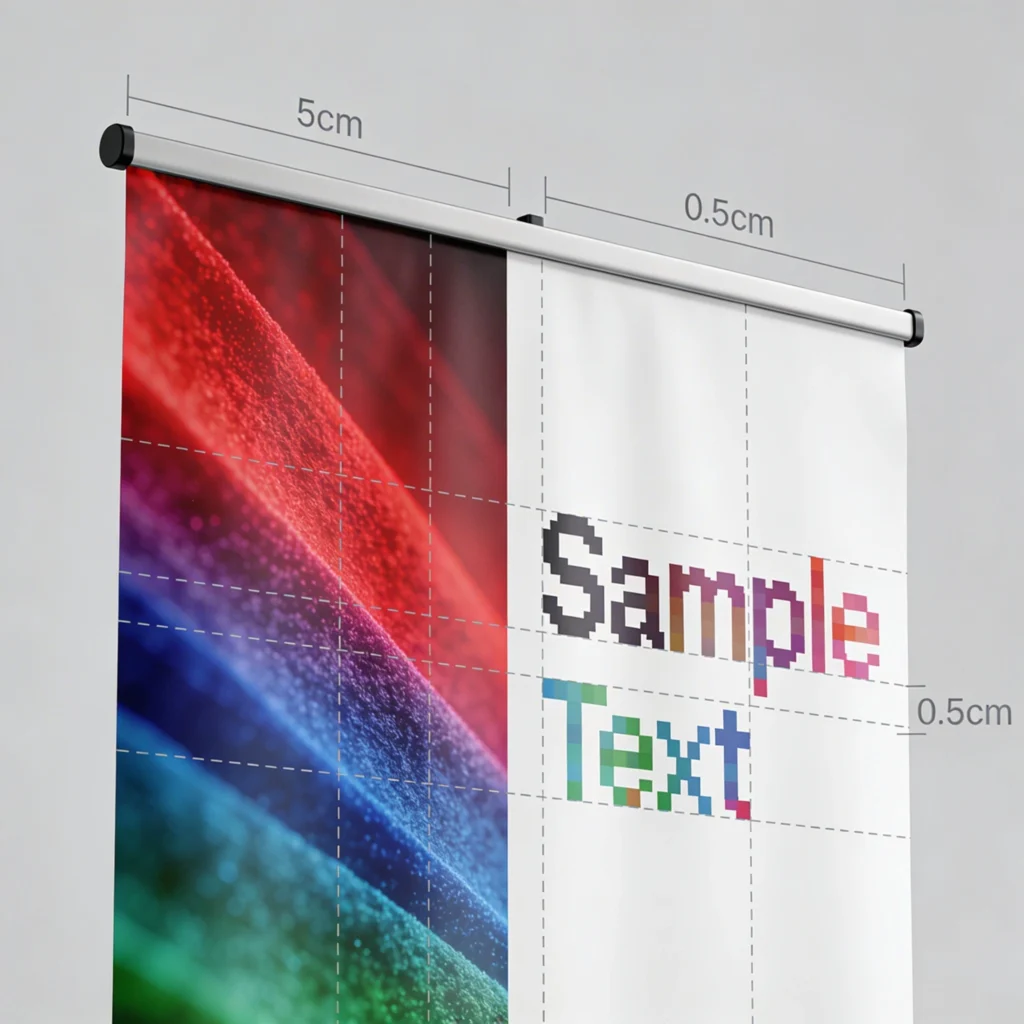
For pop up banners around 800 mm × 2000 mm, aim for artwork at 100–150 dpi at full size, not 300 dpi like brochures. At typical viewing distances of 2–3 metres, the human eye cannot distinguish higher resolutions, so bigger files only slow uploads. However, logos and small body text should start from vector artwork, preventing fuzzy edges when enlarged significantly.

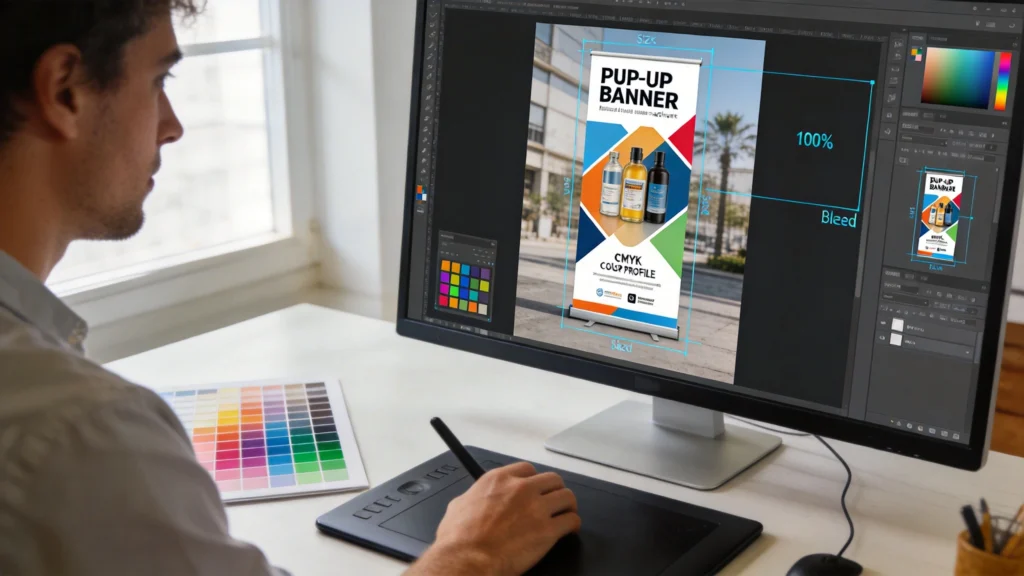
Colour Profiles, Bleed and Safe Areas

Most printers request CMYK colour profiles, often FOGRA39 or ISO Coated v2 in Europe, because their presses lay down cyan, magenta, yellow and black inks. Supplying RGB files can shift brand colours, especially strong blues and oranges. Always include 3–5 mm bleed on all sides and keep text at least 10–15 mm inside the trim line, avoiding accidental cropping during finishing.

2

File Setup and Artwork Preparation for Pop Up Banner Printing

Correct file setup is the single biggest factor determining whether your pop up banners print cleanly. Printers typically prefer high‑resolution PDFs exported from professional design software, because these lock in fonts, vectors and colour profiles. Spending an extra 20 minutes preparing artwork properly can save days of back‑and‑forth and expensive reprints when deadlines are tight.

File Setup and Artwork Preparation for Pop Up Banner Printing

Working closely with a pop up banner printing supplier means treating them as a technical partner, not just a vendor. Sharing clear specifications, requesting test prints and reviewing proofs together helps catch issues early. A reliable supplier will advise on materials, colour management and hardware compatibility to ensure your banner performs flawlessly on-site.

Choosing File Formats and Managing Fonts

Supply final artwork as a print‑ready PDF/X‑1a or PDF/X‑4 at full banner size, with crops and bleed included. Avoid sending native PowerPoint or Word files, which often substitute fonts and resize images unpredictably on the printer’s system. Convert text to outlines or embed fonts fully, and keep raster images at 100–150 dpi at final dimensions to prevent visible pixelation.

Layout Considerations and Brand Consistency

Design banners at their actual physical size, for example 850 mm × 2150 mm, including cassette‑hidden areas marked on the printer’s template. Place key messages between 700 mm and 1700 mm from the base, where they sit at eye level for most adults. Lock colour values using your brand’s CMYK or Pantone references, ensuring every pop up advertising banner aligns visually across different events and venues.

3

Choosing Materials and Finishes for Pop Up Banner Printing

Choosing Materials and Finishes for Pop Up Banner Printing

Choosing materials and finishes for your pop up banner affects not only durability, but also how your design appears under real event lighting. Glossy PVC can boost colour vibrancy but reflect glare, while matte fabrics reduce reflections and look softer. Considering venue lighting, transport needs and usage frequency helps you select the most suitable substrate.

The substrate and finish you choose influence not only how pop up banners look, but also how long they last and how easily they travel. Vinyl, polyester fabric and grey‑backed films all behave differently under strong lighting and frequent handling. Matching material to environment stops problems like curling edges, glare from spotlights or see‑through graphics on bright exhibition floors.

Material Options for Different Environments

PVC vinyl around 440–510 gsm is common for indoor roll‑ups, offering durability and strong colour saturation at relatively low cost. For premium events, 240–260 gsm polyester fabric reduces glare and gives softer, high‑end visuals, especially under LED lighting. Grey‑backed light‑stop films prevent show‑through when banners stand in front of windows or illuminated displays, keeping colours solid and legible.

Finishes, Lamination and Light Conditions

Matte finishes reduce reflections from overhead halogen or LED spotlights, improving readability at conferences and trade shows. Gloss finishes intensify colours but can create mirror‑like glare, especially on dark backgrounds. Some suppliers offer scratch‑resistant or anti‑curl coatings, useful when banners are assembled dozens of times each year. Discuss lighting conditions and handling frequency so the printer can recommend the most resilient combination.

4

How to Work with a Pop Up Banner Printing Supplier

Working effectively with a pop up banner printing supplier turns a technical process into a predictable, low‑stress workflow. Printers rely on specific information about dimensions, hardware type and event dates to choose the right materials and schedule production. Clear communication at the briefing stage prevents costly assumptions, such as producing indoor‑only graphics for semi‑outdoor venues with strong sunlight.

How to Work with a Pop Up Banner Printing Supplier

Effective file setup for pop up banner printing means working at full size with sufficient resolution, correct CMYK colour profiles and clearly defined bleed and safe areas. Outlining fonts, embedding images and checking margins ensures nothing important is trimmed or distorted, so the printed banner matches the approved artwork exactly on event day.

Briefing Your Printer with the Right Details

When requesting a quote, include exact visible graphic size, cassette brand if reusing hardware, and intended location, such as indoor exhibition hall or shopping centre atrium. Share your brand guidelines, including CMYK or Pantone references and minimum logo sizes. State deadlines backwards from your event date, allowing at least 3–5 working days for production plus shipping, especially for multi‑banner orders.

Understanding Technical Feedback and Constraints

If your supplier flags low‑resolution images or unsuitable colour builds, ask them to show a 100% zoom screenshot or test strip. This visual evidence clarifies whether issues are acceptable from typical viewing distances. Many large‑format printers also provide downloadable templates for specific pop up banners; building your artwork over these ensures correct panel heights and avoids hidden areas inside the base unit.

5

Proofing, Colour Matching and Quality Checks in Pop Up Banner Printing

Proofing is where you catch mistakes before they become expensive rolls of unusable vinyl. Because pop up banner printing uses different machines and inks than office printers, on‑screen previews alone are unreliable. Building a structured proofing process around digital PDFs and, where necessary, physical test prints significantly reduces surprises when you unbox the finished stand on event day.

Proofing, Colour Matching and Quality Checks in Pop Up Banner Printing

Digital and Physical Proofing Options

Most suppliers start with a low‑resolution digital PDF proof for layout approval, confirming text, spelling and alignment. For strict brand colours, request a small A3 or A4 hard proof printed on the actual banner material, which typically adds 1–2 days and a modest fee. Compare this proof under neutral daylight or 5000–6500 K lighting to judge colour accuracy realistically.

  • Zoom to 100% on the digital proof and check every line of text, including URLs, phone numbers and legal disclaimers.
  • Compare logo colours against a printed brand guideline, not a laptop screen, to avoid backlit display distortions.
  • Inspect gradients and large flat colour areas for banding or streaks, which may indicate printer calibration issues.
  • Ask for a re‑ripped proof if you change fonts or embedded images after the first approval, avoiding RIP mismatches.
6

Turnaround Times, Delivery and Avoiding Last-Minute Issues

Turnaround times for pop up banner printing range from same‑day service to a week or more, depending on quantity and finishing complexity. Leaving adequate time for proofing, production and shipping is the easiest way to avoid panic. Many problems, from damaged parcels to colour corrections, can be solved calmly when you build two or three buffer days into your schedule.

Turnaround Times, Delivery and Avoiding Last-Minute Issues

Typical Lead Times and Rush Options

For a single standard 850 mm × 2000 mm banner, many UK printers offer 2–3 working day production after artwork approval. Orders of 10–20 units or custom sizes may extend this to 4–5 days, especially with premium materials. Same‑day or next‑day rush services often carry a 25–50% surcharge, so planning ahead usually saves both money and stress.

Quantity Production Time Typical Cost Range (UK) Rush Surcharge
1 banner 2–3 working days £60–£120 including stand +25–40% for next‑day
5 banners 3–4 working days £250–£450 total +30–50% for 48‑hour
10 banners 4–5 working days £450–£850 total By negotiation
20 banners 5–7 working days £900–£1,600 total Often unavailable
Banner only 2–3 working days £30–£70 each +20–35% express

Always confirm whether quoted lead times start from payment, artwork receipt or proof sign‑off, as this can shift delivery by several days. Request tracking details and inspect cartons on arrival, photographing any visible damage before signing. If you’re travelling to an event, consider shipping pop up banners directly to the venue a day early, reducing the risk of airline mishandling or lost luggage.

7

Cost Factors in Pop Up Banner Printing and How to Budget

Budgeting for pop up banner printing means understanding how size, material, quantity and hardware affect total cost. A basic economy stand might cost under £60, while a premium double‑sided system can exceed £200. Breaking down these elements helps you decide where to invest, such as upgrading hardware for longevity while choosing standard material for short‑term campaigns.

Cost Factors in Pop Up Banner Printing and How to Budget

How Size, Hardware and Quantity Influence Price

Standard 800–850 mm wide banners are cheapest because printers stock cassettes and materials in bulk. Wider 1000–1500 mm units require more substrate and often heavier hardware, raising prices by 30–70%. Ordering five or more banners usually unlocks volume discounts of 10–25%, so consolidating multiple campaigns into one print run can significantly reduce your average unit cost.

  • Use economy hardware for one‑off events, but invest in mid‑range stands for repeated monthly exhibitions and roadshows.
  • Choose banner‑only reprints when updating campaigns; reusing existing cassettes can cut replacement costs by roughly 40–60%.
  • Keep designs evergreen by avoiding specific dates, allowing the same pop up banners to serve multiple annual events.
  • Request quotes for two material options to see whether a small upgrade delivers better durability over a 12–24‑month period.
8
pop up banners

Reprinting, Updating and Reusing Printed Pop Up Banners

Pop up advertising banners rarely stay current forever; campaigns change, offers expire and branding evolves. Planning for reprints from the start lets you update graphics without replacing hardware each time. Many cassette systems allow banner‑only swaps, where printers attach new prints to the existing mechanisms, significantly lowering both cost and environmental impact over several marketing cycles.

Reprinting, Updating and Reusing Printed Pop Up Banners

When to Reprint and How to Reuse Hardware

Consider reprinting when key details—such as pricing, product names or web addresses—change, or when graphics show visible scuffs after dozens of deployments. Store stands upright in their padded bags and avoid damp environments, extending hardware life beyond three years. When ordering, ask whether the chosen system supports banner‑only replacements and keep original artwork organised for quick future updates.

Scenario Recommended Action Approximate Cost Typical Lifespan
Minor copy change Banner‑only reprint £30–£70 per unit 12–24 months of use
New brand identity New banners, reuse cassettes £40–£80 per unit 3–5 years hardware
Damaged mechanism Replace full stand £60–£150 each Up to 5 years
Seasonal campaign Alternate graphics sets £30–£70 per banner Rotate annually
Multiple languages Shared hardware, swap prints £30–£70 per language 2–3 years rotation

By standardising on one or two cassette types across your organisation, you simplify storage, transport and future reprints. Track which artwork files correspond to which physical stands using labels or QR codes on the carry bags. Over a three‑year period, this approach can cut your total spend on pop up banner printing by 30–50%, while keeping campaigns fresher and more relevant.

Cart