When we talk about marketing materials for events, we’re talking about the physical, touchable stuff that brings your brand to life. Think bold banners, handy flyers, and impressive backdrops. These are the tools you use to transform a generic event space into an environment that screams your brand, guiding attendees and creating an experience they won't forget.
In a world buzzing with digital noise, these materials are your secret weapon to stand out. The best ones nail three things: bold visuals, clear messaging, and strategic placement. Get that trio right, and you’ll not only capture attention but drive real engagement.
Why Physical Marketing Materials Still Run the Show at Events
Picture this: you walk into a massive exhibition hall. Your phone is buzzing, and screens are flashing ads everywhere. But what actually catches your eye and makes you stop? It’s the huge pop-up displays, the sharp roller banners, and the brochure you can actually pick up and flick through. These physical materials don’t just announce you’re there; they build a real, physical footprint for your brand.
In an age of endless digital pings, a well-designed piece of print offers something different—a tangible connection. It anchors your brand in the real world, turning a simple booth into a destination and a passing glance into a proper conversation. That physical presence is absolutely crucial for making a lasting impression.
Building a Brand Experience People Remember
Your event materials should all work together to tell one cohesive story. Think of them as the set design for your brand’s live show. A consistent look and feel across your backdrop, signage, and flyers creates a polished, professional atmosphere that builds trust and makes you instantly recognisable.
This branded environment does a few key jobs for you:
- Guides the Attendee Journey: Clear wayfinding signs and smartly placed banners direct the flow of people, making sure they can easily find you and move around your space.
- Sparks Conversation: A clever display or a unique handout is a brilliant icebreaker. It gives your team a natural opening to start chatting with potential customers.
- Reinforces Your Message: A digital ad is forgotten in a second. But a flyer or a branded goodie often goes home with an attendee, keeping your brand in their mind long after the event is over.
The big idea is simple: the right marketing materials turn your patch of floor space from a temporary plot into a must-visit brand destination. They create an experience that people remember and talk about.
In the UK's bustling events scene, where 85 million people attend everything from trade shows to festivals each year, materials like custom banners and branded displays are the unsung heroes that make brands pop. With the UK events industry valued at a massive £42 billion, it’s no surprise businesses are investing heavily in high-impact visuals to grab a slice of that attention. You can find more insights into the UK events industry on Display Wizard. This spending proves just how powerful physical media is for forging real connections in crowded spaces.
Choosing Your Event Marketing Arsenal
Think of your event marketing materials like a specialised toolkit. You wouldn't use a hammer to saw through wood, and in the same way, the banner that steals the show at an outdoor festival isn’t the right fit for a polished corporate trade show. Picking the right tools for the job is the first, most crucial step towards building a brand presence people remember.
Your arsenal should be a smart, cohesive collection of items, each with a clear purpose. From the big, impressive focal points to the small details that guide attendees through your space, every single piece plays a part. Let’s break down the essentials and see where each one truly shines.
The Heavy Hitters: Large Format Displays
These are the absolute foundations of your event setup—the pieces that create your “brand home” inside a busy venue. They’re designed to be seen from across the room, pulling people in and staking your claim on the event floor.
- Pop-up Displays and Backdrops: These are the stage set for your brand's performance. They create a professional, seamless backdrop that instantly defines your territory, making it the perfect spot for photos, videos, and interviews. With a large, unbroken graphic area, your core message is impossible to miss.
- Roller Banners (Pull-up Banners): Consider these the versatile infantry of your marketing army. They're incredibly portable, a breeze to set up, and perfect for flanking your main display, highlighting a special offer, or adding a splash of branding to smaller nooks. Their vertical design is ideal for short, sharp, high-impact messages.
- Vinyl and Mesh Banners: When you're heading outdoors or need to go big, these are your go-to options. Weatherproof vinyl banners can be hung just about anywhere to announce your presence, while fence mesh is a game-changer for construction sites and festivals, giving you huge branding real estate that still lets the wind pass through.
For anyone exhibiting in a competitive space, getting the display system right is key. To make sure your booth really stands out from the crowd, you can dive deeper into our guide on choosing the best banners for trade show displays.
The Navigators: Guiding and Informing
Once you’ve grabbed attention with your big displays, you need materials that direct, inform, and engage people up close. These are the elements that make finding your stand and understanding what you offer a completely painless experience.
Wayfinding signs, for instance, are the unsung heroes of any large event. They act as a friendly guide, cutting down on confusion and channelling foot traffic exactly where you want it to go. Clear, well-placed directional signs are vital for creating a smooth and positive journey for every attendee.
This whole process—weighing the lasting impact of physical items against fleeting digital ads—is at the heart of event strategy. This diagram shows that core choice perfectly, visualising how digital and physical marketing stack up when it comes to audience memory.

The takeaway here is massive for event planners: physical materials create a stronger, more lasting impression on memory compared to their digital counterparts.
Matching Your Material to the Mission
Choosing the right tool can feel overwhelming, but it's simpler when you match the material to your goal. This quick-reference table breaks down what to use, where, and why, helping you build the perfect event toolkit.
| Material Type | Best For (Event Type) | Primary Goal | Key Benefit |
|---|---|---|---|
| Pop-up Backdrop | Trade Shows, Conferences | Create a branded environment | Professionalism, photo opportunities |
| Roller Banner | Indoor Exhibitions, Receptions | Quick, portable messaging | High versatility, easy setup |
| Vinyl Banner | Outdoor Festivals, Markets | Announce presence from afar | Durability, weather resistance |
| Wayfinding Signage | Large Venues, Multi-stage Events | Guide attendee flow | Improved experience, crowd control |
| Promotional Flags | Outdoor Events, Forecourts | Capture attention with motion | High visibility, dynamic feel |
| Flyers/Brochures | All Events | Provide detailed information | Tangible takeaway, post-event recall |
By carefully selecting a mix of these materials, you create a multi-layered, immersive experience. You won't just attract attention—you'll effectively communicate your brand's value from every single angle.
The Attention Grabbers: Movement and Interaction
Static displays are your foundation, but adding a little movement or interaction can seriously boost engagement. These materials are designed to catch the eye with motion or give people something tangible to connect with.
Promotional flags, for example, are brilliant for outdoor settings. Their fluttering movement naturally draws the eye, making them an effective way to mark an entrance or inject some energy into your setup. They signal activity and excitement, inviting people to come over and see what’s happening.
Your marketing materials should not just inform; they should interact. The goal is to move beyond passive observation and create active engagement, turning a passer-by into a participant in your brand story.
Interactive elements are also gaining huge traction. While not a traditional printed item, mixing in technology can elevate your space. To stay ahead of the curve, it's worth understanding how experiential marketing and AI photo booth trends are shaping the future of attendee engagement.
The Conversation Starters: Tangible Takeaways
Finally, you need the materials that attendees can hold in their hands and take home. These items keep the conversation going long after the event wraps up, keeping your brand front and centre in their minds.
- Flyers and Brochures: These classic leave-behinds are perfect for sharing detailed information that just won't fit on a banner. A well-designed brochure lets a potential customer explore your products or services at their own pace.
- Point of Sale (POS) Displays: Small, cleverly placed displays like strut cards or countertop units are great for highlighting a specific product, a QR code for your mailing list, or a special event-only discount right where decisions are made.
- Business Cards: A networking staple for a reason. The business card is still a powerful tool for making a personal connection, and a unique finish or high-quality cardstock can make a truly memorable first impression.
Getting the Technical Details Right
The difference between marketing materials that look professional and those that just look cheap often boils down to the small technical details. Choosing the right specifications is like picking the right ingredients for a recipe; get them right, and the final result is brilliant. Get them wrong, and the whole thing can fall completely flat.
This is where you move beyond the creative design and start thinking about the physical object itself. A beautiful banner design printed on flimsy, see-through material simply won't make the impact you're hoping for. Getting to grips with the jargon is the key to making smart investments, ensuring your materials don't just look good on day one, but last for many events to come.
Decoding Material Weights and Finishes
When you see terms like ‘gsm’ or ‘microns’, just think of them as a simple measure of quality and durability. GSM stands for Grams per Square Metre, and it tells you how heavy and thick the material is. As a general rule, a higher gsm number means a heavier, more durable product.
For example, a standard indoor banner might be printed on 440gsm PVC, which is perfectly fine for a one-off event inside a controlled environment. But if you're planning an outdoor festival or a multi-day trade show, upgrading to a heavier 510gsm PVC is a very wise move. That extra weight gives it greater tear resistance and a more substantial, premium feel that holds up much better against general wear and tear.
It’s not just about weight, though. The finish is just as important.
- Anti-Curl or Stay-Flat Finish: This is an absolute must-have for roller banners and pop-up displays. It ensures the edges of your graphic don't curl inwards over time, keeping your display looking sharp and professional.
- Anti-Scuff Laminate: For materials that will be handled a lot, like POS displays or reusable shell scheme graphics, an anti-scuff laminate adds a protective layer that resists scratches and grubby fingerprints.
- Blockout Layer: This is an opaque layer sandwiched inside materials like double-sided roller banners. It cleverly stops light from shining through and making the graphics on the other side visible, ensuring your message is crystal clear from both directions.
Understanding these technical specs empowers you to make confident purchasing decisions. It's the difference between ordering a banner that lasts for one weekend and one that becomes a reliable part of your event kit for years.
Choosing the Right Specs for the Job
The ideal specifications for your event marketing materials depend entirely on where and how you plan to use them. There’s no single "best" option; it's all about matching the material to the mission.
A breezy outdoor music festival, for instance, requires a completely different approach than a calm indoor conference. For the festival, you'd want mesh PVC banners for any large-scale fence branding. The tiny holes in the mesh allow wind to pass right through, which reduces the 'sail effect' and stops the banner from tearing away from its fixings. You should also insist on reinforced hems and extra eyelets for added strength against the elements.
On the other hand, for that indoor conference, your focus will likely shift towards visual polish and maybe even sustainability. You might choose a PVC-free roller banner made from recyclable materials to align with your brand’s eco-conscious values. Here, a super-smooth, high-resolution print finish takes priority over wind resistance.
Don't Forget the Logistics
Nailing the technical details goes beyond just the print materials. Flawless execution also depends on the logistical chain that gets your marketing materials to the venue on time and in perfect condition.
This includes everything from the packaging to the delivery itself. For a smooth setup, mastering shipping labels printing ensures your materials arrive at the event securely and can be easily identified by venue staff when they land. It's a small step that prevents massive headaches on setup day.
Thinking through these final-mile details ensures that your beautifully printed, perfectly specified marketing materials actually make it to the event floor ready for action.
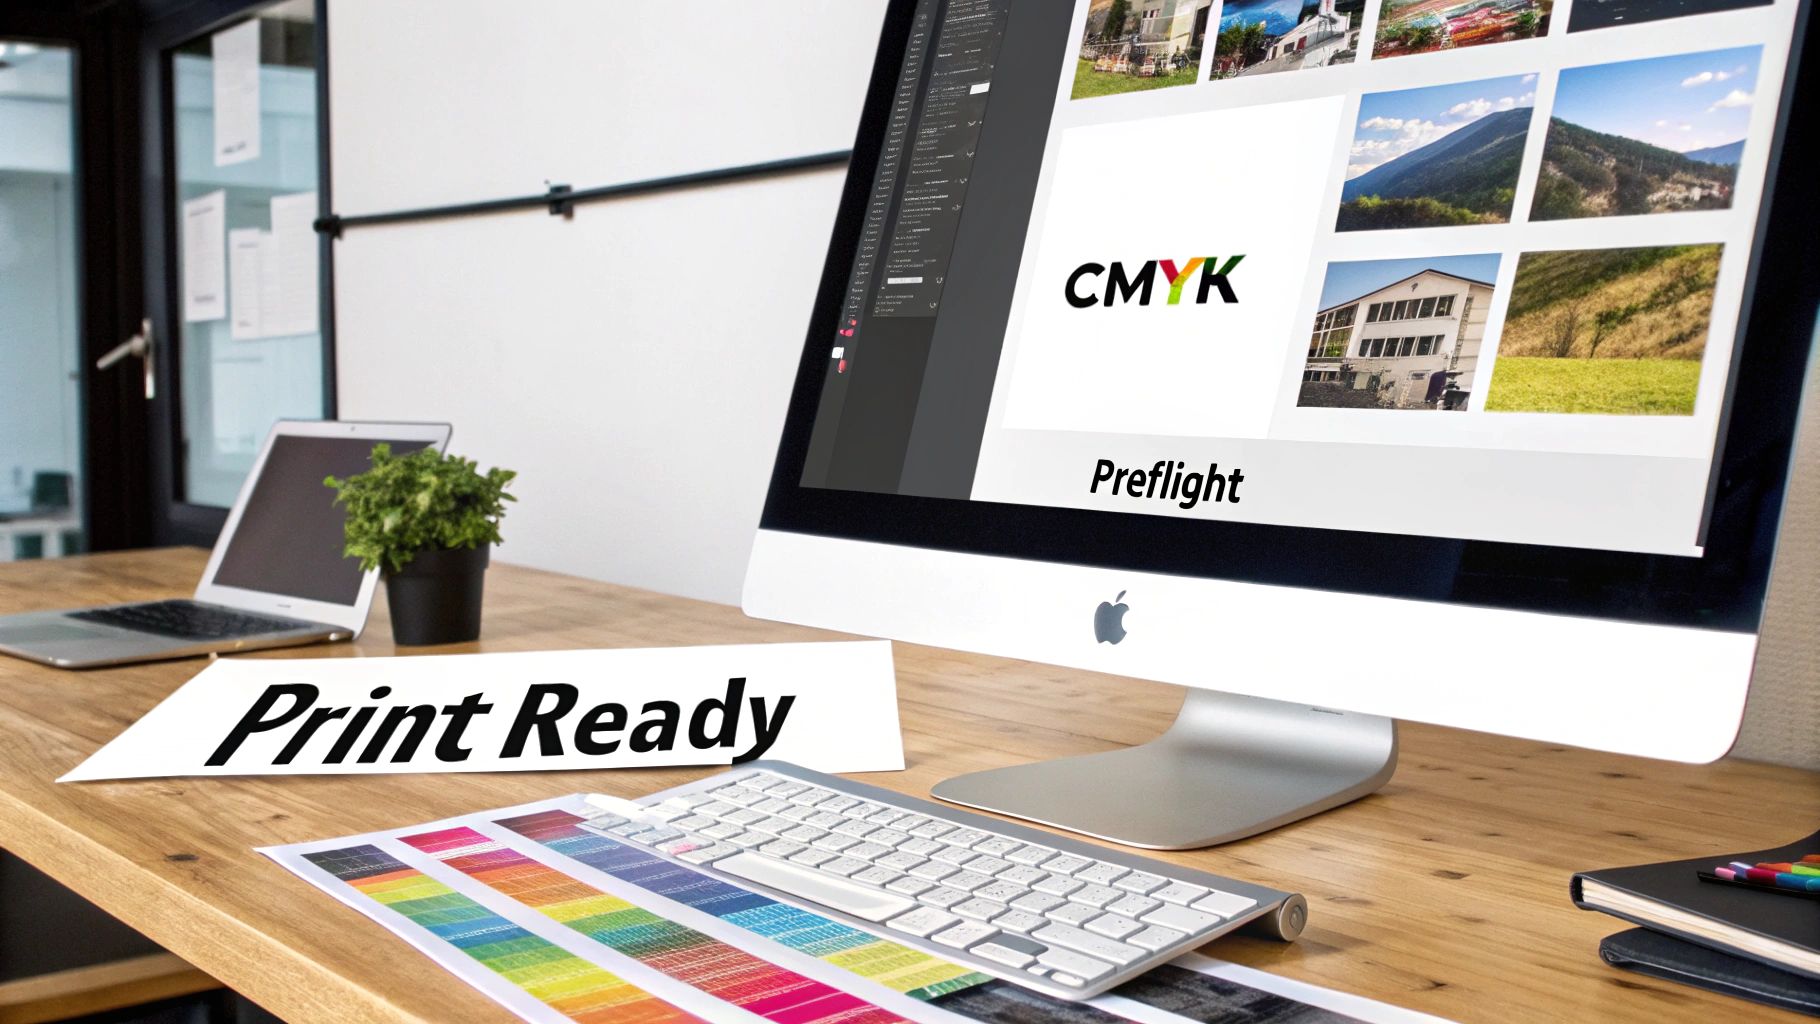
Preparing Your Artwork for a Flawless Print
Even the most brilliant design for your event materials can fall flat if the artwork isn't prepared properly for print. Think of it like a chef prepping ingredients for a masterpiece – get the prep wrong, and the final dish suffers. This final check, what we in the industry call a ‘preflight’, is your insurance policy against costly and stressful reprints. It ensures your design translates perfectly from your screen to the final printed product.
Honestly, skipping these steps is one of the most common reasons we see for print delays and disappointment. Getting them right guarantees that the vibrant roller banner or sharp backdrop you fell in love with on your monitor is exactly what gets delivered to your door.
The Non-Negotiable Artwork Checklist
The best way to avoid common pitfalls is to treat artwork submission as your final quality control check. While your print partner will almost certainly review your files, supplying a print-ready design from the get-go speeds everything up massively.
Here are the three absolute essentials you need to nail:
-
High-Resolution Images: An image that looks perfectly sharp on your website can turn into a blurry, pixelated mess when blown up on a large banner. You must always use images with a resolution of at least 300 DPI (Dots Per Inch) at their final print size for a crisp, professional finish.
-
Vector Logos and Graphics: For all logos and core brand graphics, you need to be using vector files (like .AI, .EPS, or .SVG). Unlike pixel-based images (like JPEGs), vectors are magic – they can be scaled to any size, from a tiny flyer to a massive backdrop, without losing a shred of quality.
-
The Correct File Format: The gold standard for print-ready artwork is a high-quality PDF. It's a self-contained package that embeds all your fonts, images, and layout elements, making sure nothing shifts or goes missing when your printer opens it.
For a deeper dive into file types and what we need from you, our guide on uploading artwork for custom banners has all the details.
Getting Colour and Text Right for Print
What you see on your screen isn’t always what you get in print. This disconnect usually boils down to two things: colour modes and fonts.
CMYK vs RGB Colour Mode
Your computer monitor, tablet, and phone all use the RGB (Red, Green, Blue) light-based colour model. But professional printing presses work with ink, using the CMYK (Cyan, Magenta, Yellow, Black) model. If you design in RGB, the colours can look dull or just plain wrong when they’re converted to CMYK for printing.
To make sure your brand colours come out looking exactly as they should, always set up your design file in CMYK mode right from the start. It gives you a much truer preview of the final printed result.
Convert Your Text to Outlines
This is a classic rookie mistake. If you send a design file with a font that your printer doesn’t have installed, their computer will just swap it for a default font – completely wrecking your carefully chosen typography. The fix is simple: convert all text to outlines (sometimes called ‘create outlines’) before saving your final PDF. This action turns your text into fixed vector shapes, locking your design in place for good.
Timelines and Working With Your Printer
Good planning is everything. It's the difference between a smooth ride and a last-minute panic. The UK promotional merchandise sector, which is closely tied to event materials, hit a record £1.232 billion in sales in 2024. Why? Because an incredible 90% of recipients remember the brand on these items. Well-designed physical materials have amazing recall value.
To get these powerful marketing tools in your hands on time, you need to account for every step. A typical timeline might look like this:
- Design & Approval: 1-3 working days
- Printing & Finishing: 1-2 working days
- Delivery: 1 working day
Our advice? Always build in a buffer of a few extra days, just in case. Keeping the lines of communication open with your print partner and responding quickly to any questions they have about your artwork will keep your project on track, ensuring your materials arrive looking flawless and ready for your big day.
Bringing Your Materials to Life
It's one thing to talk about banners and flyers in theory, but seeing them work their magic in the real world is where it all clicks. Let's move from concept to reality and look at four scenarios where a smart selection of marketing materials for events turned a common business challenge into a roaring success.
These aren't abstract ideas. They’re practical blueprints showing how small businesses, retailers, construction firms, and event planners just like you can get real results.
The Small Business Making a Splash at a Trade Show
Picture a local tech startup at their first national conference. They've got a modest budget and a tiny team, but they need to look the part, draw people in, and generate leads without getting lost in the sea of big-name competitors. They needed to punch above their weight with materials that were high-impact but low-hassle.
The solution was a cleverly curated kit, designed for maximum presence with minimum fuss.
- 1 x 3m Pop-Up Backdrop: This was the anchor. It instantly created a polished, branded wall that defined their space and gave them a professional background for every conversation.
- 2 x Roller Banners: Positioned like sentinels at the front corners of the booth, each one screamed a key product benefit, acting as a magnet for curious passers-by.
- 1 x Branded Tablecloth and A5 Flyers: The tablecloth tied the whole look together, while quality flyers gave genuinely interested visitors something solid to walk away with.
The outcome? A booth that oozed credibility. The layered, clear messaging helped them pull in 30% more visitors than they’d aimed for, and the professional setup gave their small team the confidence they needed to seal the deal.
The Retailer Launching a Seasonal Sale
A boutique on a busy high street needed to make its annual summer sale unmissable. The goal was to slice through the surrounding noise, create a real sense of urgency, and pull shoppers through the door. This called for visuals that were impossible to ignore.
Their strategy was all about capturing attention from the pavement. They turned their entire shopfront into a beacon for bargain-hunters by using bold, consistent branding across a few key formats.
The lesson here is simple but critical: your event materials have to fit your environment. On a bustling high street, big, bold, and direct is the only way to go.
The shop used huge, colourful window vinyls shouting "50% OFF SUMMER SALE" that you could see from across the road. A weatherproof PVC banner hung above the entrance hammered the message home, while a humble A-board on the pavement gave shoppers that final nudge to step inside. This coordinated visual attack led directly to their best-ever opening weekend.
The Construction Firm Building Public Trust
A construction company landed a major project right in a city centre. They had two jobs: keep the site safe and use the prime location as a branding opportunity. This meant finding materials tough enough to handle the elements while projecting a professional image to thousands of people every day.
They chose custom-printed fence mesh to wrap the entire perimeter. This was a genius move. The mesh kept dust down and provided privacy, but far more importantly, it transformed hundreds of metres of boring hoarding into a giant, rolling billboard.
The design showcased their logo, stunning project renderings, and the tagline "Building Your Future." It didn't just boost brand recognition; it showed a commitment to the community and turned a health-and-safety requirement into a powerful piece of marketing.
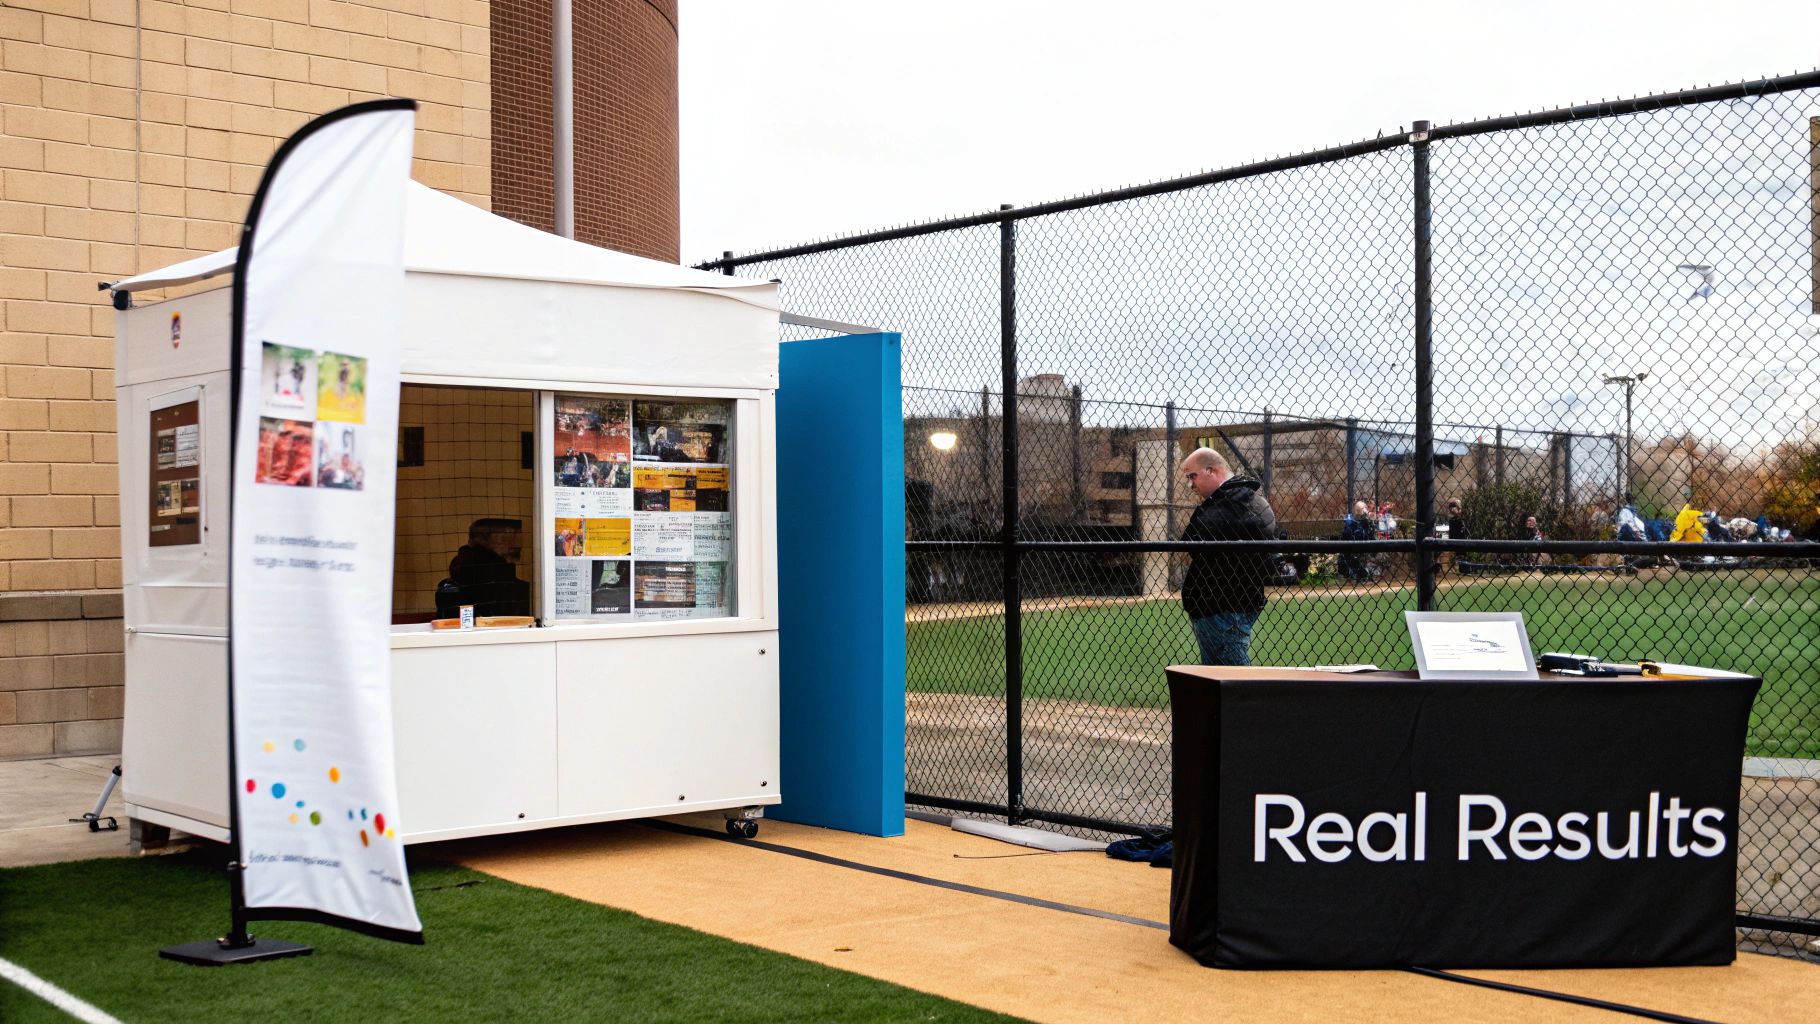
The Festival Organiser Taming the Crowd
Imagine trying to guide thousands of music fans across a massive open field with multiple stages. An event planner knew that clear navigation was crucial for safety and a good vibe, but it also had to feel like part of the festival's vibrant brand.
The answer was a comprehensive system of large-format signage and dynamic visual cues.
- Large Stage Banners: Each stage had its own massive, uniquely designed banner, making it instantly recognisable from a distance. No more "which stage is which?" confusion.
- Wayfinding Flags and Signage: Tall, brightly coloured feather flags marked essential spots like first aid, toilets, and food vendors. Their height made them visible above the crowd, and their gentle movement naturally caught the eye.
This strategic deployment of marketing materials for events created a seamless experience for everyone. The clear navigation cut down on congestion and confusion, and the consistent, fun branding helped build an unforgettable festival atmosphere.
Budgeting and Maximising Your Investment
When it comes to your event marketing materials, smart budgeting isn't just about finding the cheapest price. It’s about making every pound count for the long haul. The real goal is to invest in quality and versatility, ensuring your materials work hard for your brand again and again.
Think of it like buying a good suit versus a cheap one. The cheap one might look okay for one night, but a well-made one becomes a staple you can rely on for years. It's the same with your event kit. Spending a little more upfront on a durable pop-up display or a timeless roller banner means you can use it repeatedly, bringing its cost-per-use down dramatically over time.
Making Smart, Cost-Effective Choices
To get the best return, you need to focus on flexibility. Materials that can adapt to different events and spaces will always deliver the most value.
- Go Non-Dated: It's a simple trick, but an effective one. Avoid putting specific event names or dates on your main displays like backdrops and roller banners. This instantly turns them from single-use items into evergreen brand assets.
- Invest in Modular Systems: A modular exhibition stand might seem like a bigger initial investment, but its ability to be reconfigured for different booth sizes makes it incredibly cost-effective in the long run.
- Prioritise Durability: Always opt for higher-quality materials where you can. A heavier 510gsm PVC for banners or displays with an anti-scuff finish will survive the wear and tear of transport and repeated setups, saving you from having to buy replacements.
For any business watching its bottom line, exploring affordable banner printing that doesn’t cut corners on quality is the perfect place to start.
Embracing Sustainability in Your Event Strategy
Today’s customers care about where their money goes, and they actively support brands that show a real commitment to the environment. Your choice of marketing materials is a very public, very tangible way to demonstrate that you share those values.
Choosing sustainable materials is no longer just an ethical decision; it's a strategic one. It aligns your brand with the values of a growing base of eco-conscious customers and can be a significant differentiator in a crowded market.
Look for modern alternatives like PVC-free banner materials or displays built from recycled and recyclable components. These greener options often deliver the same quality and durability as traditional materials but come with the added bonus of boosting your brand’s reputation. Making these responsible choices ensures your marketing efforts tick all the right boxes—for your budget, your brand, and the planet.
Your Event Marketing Questions Answered
Still got a few things you're wondering about before you press go on your event materials? We get it. Here are the answers to some of the most common questions we hear, helping you get your plans sorted with total confidence.
What Is the Best Material for an Outdoor Banner?
When your banner has to stand up to the British weather, you've got two brilliant choices. For sheer durability and toughness, you can't go wrong with 510gsm PVC vinyl. It’s built to last.
But if you’re setting up in a windy spot, PVC mesh is the way to go. The tiny holes let the wind pass right through, so your banner won't turn into a giant sail and tear away from its fixings.
How Much Should I Budget for Event Materials?
This really comes down to the size of your event. If you're heading to a small local market, you might only need a couple of roller banners and a stack of flyers, which could just be a few hundred pounds.
On the other hand, for a big national trade show, a full stand with a pop-up backdrop, multiple displays, and all the trimmings could run into the thousands.
As a solid rule of thumb, try setting aside 15-20% of your total event budget for marketing materials. This gives you enough to create a professional, eye-catching setup without breaking the bank.
How Far in Advance Should I Order My Materials?
Our best advice? Give yourself plenty of breathing room. To avoid any last-minute panic, we always recommend getting your artwork finalised and placing your order at least 7-10 working days before you need everything.
This timeline covers printing, finishing, and delivery, and—most importantly—it gives you a safe buffer just in case of any unexpected courier delays.
Ready to create marketing materials that stop people in their tracks? Explore our full range of customisable banners, displays, and signage at Banner Printing Ltd. Visit https://bannerprintingltd.co.uk to upload your artwork and get your next event sorted today.


