Printing in A1 is the savvy way UK businesses and event organisers make a real impact without taking over the entire room. But to get a flawless print, you’ve got to nail the basics before you even think about uploading your file. This guide is your pre-flight checklist, helping you dodge the common pitfalls that can ruin a great design.
Your Foundation for a Perfect A1 Print
When you’re planning a project, the term "A1" gives everyone a clear, professional standard to work from. It's a fantastic canvas – big enough to catch the eye from across a room, yet manageable enough for indoor displays, trade show stands, and pop-up events. Think of it as the visual communication sweet spot: impactful but not overwhelming.
Before you even launch your design software, it’s vital to get your head around what makes an A1 print successful. It's not just about the picture on the page; it’s the whole process, from the initial idea to the physical product in your hands. Getting this initial planning stage right is what saves you from the headache of costly reprints and missed deadlines.
Why Pre-Planning Matters
One of the most common mistakes we see is artwork designed in a vacuum, without any thought for its final home. For instance, an A1 poster destined for a construction site hoarding needs a completely different material—like weatherproof PVC vinyl—than one for an indoor art gallery, which would look stunning on a satin-finish paper.
Thinking about these details upfront guarantees your final print isn't just beautiful, but actually fit for purpose. Start by asking yourself a few key questions:
- Where is this print going to live? (Indoors, outdoors, in a window, on a wall)
- How long does it need to last? (Is it for a one-day event or a six-month campaign?)
- From how far away will people be looking at it? (Does it need fine detail up close, or bold visibility from a distance?)
Answering these helps you lock in the right materials and finishes, paving the way for a perfect print. The A1 format is just one piece of the puzzle in a much larger system of standard paper dimensions. For a bit more context, you can explore our detailed guide on poster printing sizes to see how A1 stacks up against other options.
A great A1 print starts long before you open Photoshop. It begins with a crystal-clear understanding of your goal, your audience, and the environment where your message will be seen. Get this right, and all the technical steps become a whole lot simpler.
The A1 Advantage for Businesses
For UK businesses, printing A1 size is a seriously cost-effective way to make a big statement. It’s the go-to choice for everything from in-store promotions and menu boards to conference signage and architectural plans. Because its dimensions (594 x 841 mm) are standardised, every printer in the country knows exactly what you mean, making the whole ordering process smooth and predictable. This groundwork ensures your message lands exactly as you intended, every single time.
Getting Your Artwork Ready for an A1 Print
A jaw-dropping A1 print doesn't just happen by magic. It all starts with a perfectly prepared digital file. Honestly, getting the technical specs right isn't just a suggestion—it's the only way to guarantee the sharp, vibrant results you’re picturing in your head. Think of your artwork file as the blueprint for your finished print.
The first, and most important, step is setting up your document correctly. Your canvas absolutely must be set to the exact A1 dimensions: 594mm wide by 841mm high. I’ve seen people try to scale up a smaller file, like an A4 document, and the result is always a blurry, pixelated mess. Always, always design your artwork at its final print size from the get-go.
This little flowchart breaks down the essential journey to a flawless print, kicking off with dimensions and moving through to the final quality checks.
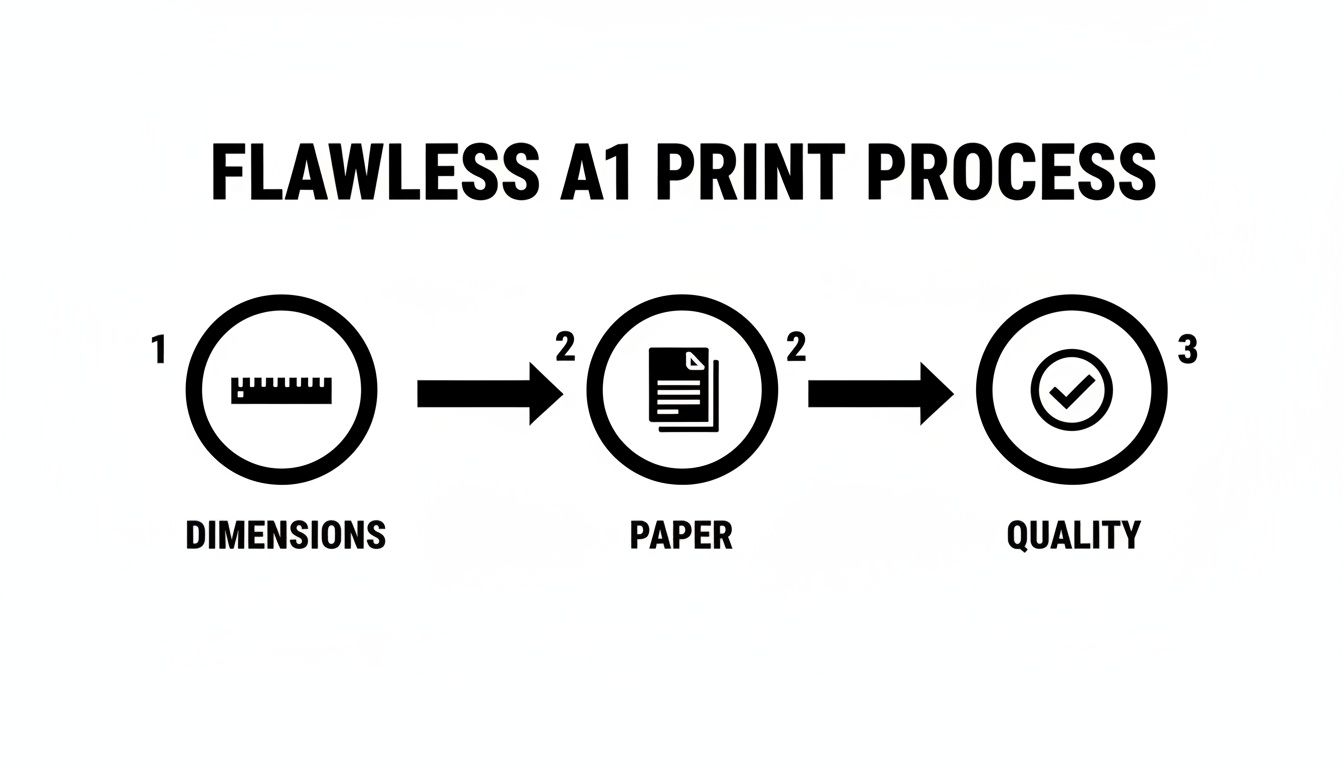
It’s a great visual reminder that technical accuracy is the foundation everything else is built on.
Dialling in Your Resolution and Colour
Right alongside the dimensions, your file’s resolution is what gives it that crisp, professional finish. For high-quality printing, the industry standard is 300 DPI (dots per inch). Anything less, like the 72 DPI typically used for web images, will look fuzzy and amateur when blown up to A1 size.
Next up is the colour profile. Your computer screen shows colours in RGB (Red, Green, Blue), but professional printers work in CMYK (Cyan, Magenta, Yellow, Black). If you design in RGB, you’re in for a nasty surprise when it prints, as bright colours can suddenly look dull and muted. To avoid this, set your document's colour mode to CMYK right from the start.
To really nail your colours, it’s worth reading up on ensuring color accuracy with ICC profiles before you send anything off. It’s a small step that makes a huge difference to the final product.
Key Takeaway: A print-ready A1 file should always be 594mm x 841mm, set to 300 DPI, and use a CMYK colour profile. Get these three things right, and you've already dodged over 90% of the most common printing problems.
Understanding Bleed and Safe Zones
Ever seen a print with a thin, ugly white border it wasn't supposed to have? That's what happens when the artwork has no bleed. Bleed is a small safety margin where your design extends beyond the final trim line. Because large-format printers can have tiny shifts during the cutting process, this extra bit ensures your design goes right to the very edge.
For A1 printing, a standard 3mm bleed on all four sides is what you need. This means your actual artwork file will be slightly bigger than the final print at 600mm x 847mm.
Just as crucial as the bleed is the safe zone. This is an inner margin where you should keep all your vital text, logos, and key information. A good rule of thumb is to keep these elements at least 5mm away from the trim edge to prevent them from getting accidentally chopped off.
Here’s a quick-reference table to make sure you've covered all the bases before you hit 'send'.
A1 Print Artwork Checklist
Use this quick-reference table to confirm the essential technical settings for your A1 size artwork file before sending it to print.
| Setting | Specification | Why It Matters |
|---|---|---|
| Canvas Size | 594mm x 841mm | This is the final trim size of an A1 print. Designing at this exact size ensures no quality is lost. |
| Artwork with Bleed | 600mm x 847mm | Adding a 3mm bleed on all sides prevents white edges after the print is trimmed. |
| Resolution | 300 DPI | Guarantees your images and text will be sharp and clear, not pixelated. |
| Colour Profile | CMYK | Matches the ink process used by professional printers, ensuring your colours look as intended. |
| Safe Zone | 5mm from the trim edge | Protects your critical information (logos, text) from being accidentally cut off during finishing. |
By checking these five settings, you’re putting yourself in the best possible position for a perfect print outcome.
For a bit more detail on preparing your files, our guide on uploading artwork for custom banners has some extra tips that are useful for any large-format job.
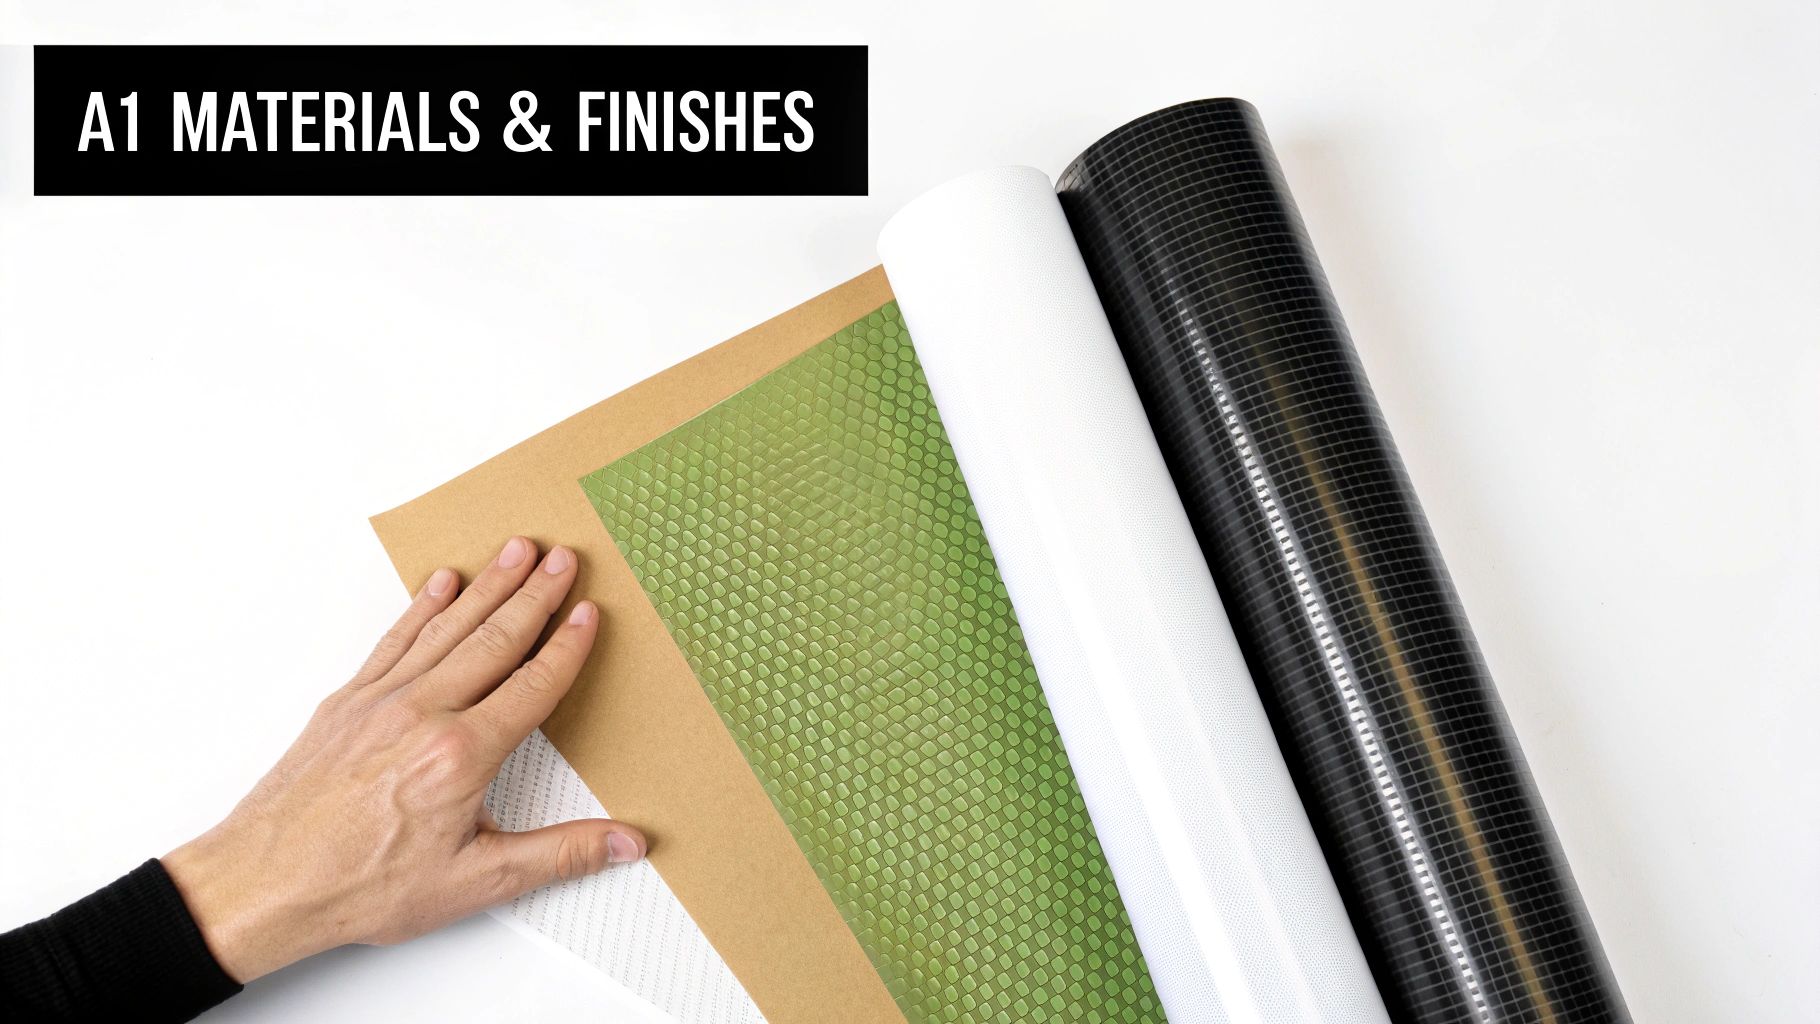
Choosing the Right Materials and Finishes
Getting the material right can completely change the look, feel, and lifespan of your A1 print. It's the difference between a poster that looks washed out after a week in a sunny window and one that stays sharp for months. The secret is matching the material to where your print will actually live.
Think about it: an A1 print for an outdoor construction site needs to be tough as nails. A weatherproof PVC vinyl is the obvious choice here—it’s made to handle rain and sun without tearing or fading. On the flip side, an indoor promo for a retail shop would look incredible on a sleek satin poster paper, giving you vibrant colours without that annoying glare.
This decision has a direct impact on your budget and how well your message lands, so it’s a step you really can’t afford to rush.
Popular Materials for A1 Prints
Let's run through some of the most common materials and what they’re best for. Each one is a tool for a specific job, and knowing their strengths is crucial.
-
Standard Poster Paper (170gsm Silk): This is your workhorse for anything indoors. It hits that sweet spot between quality and cost, with a subtle sheen that makes colours look rich and deep. It’s perfect for shop displays, event announcements, and conference posters.
-
PVC Vinyl: When you need something that lasts, PVC vinyl is your answer. It’s waterproof, tear-resistant, and built for long-term outdoor use. This makes it the go-to for banners, site hoardings, and any A1 print that needs to brave the British weather.
-
Wind-Resistant Mesh: Got a big A1 print going up on a fence or in a notoriously windy spot? Mesh is a total game-changer. It’s full of tiny holes that let the wind pass straight through, stopping that "sail effect" that can rip a solid vinyl banner right off its fixings.
Large-format printing, especially for A1-sized banners and displays, is a massive part of the UK print industry. In fact, signage alone makes up over 40% of large-format use worldwide, and you can see that everywhere here. Event organisers and retailers lean heavily on materials like wind-resistant mesh and durable displays to get noticed. You can dig into the latest large-format printing trends to see just how much this space is growing.
The Impact of the Right Finish
The final touch for your A1 print is the finish. It dictates both the look and the practicality of the final product. Your two main players are gloss and matte, and they create totally different vibes.
A high-gloss finish will make your colours absolutely sing with vibrancy and depth. It’s incredibly eye-catching and fantastic for photos, but be warned—it can create a serious amount of glare under direct lights.
On the other hand, a matte finish has a more subtle, premium feel. It soaks up light instead of bouncing it back, which kills the glare and makes text much easier to read. This is a brilliant choice for informational posters, architectural plans, or any A1 print that will be displayed in a bright room where readability is key. Nailing the combination of material and finish is what ensures your A1 print does its job perfectly.
Getting Your Order Over the Finish Line
Your artwork looks fantastic, you’ve picked the perfect material, and you’re just about ready to go. This final stage—proofing and ordering—is all about the details. It’s the crucial bridge between your digital design and the high-impact A1 print you’re picturing. Think of it less as a creative step and more as your final quality control checkpoint.
Before your job ever gets near a printer, our in-house experts run what we call a pre-flight check. This isn’t a critique of your design skills; it’s a purely technical look under the bonnet. We're hunting for those common little gremlins that can cause big problems later: low-resolution images, incorrect colour profiles, or missing bleed that might have slipped past you.
Don't Skip the Digital Proof
Once our team is happy, we'll send you a digital proof. This is your last, best chance to spot anything amiss before the ink starts flowing. Seriously, don't rush this bit.
So, what should you be looking for?
- Typos and Grammar: Read every single word out loud. It’s amazing what your brain catches when you hear it spoken.
- Layout and Placement: Is everything where it should be? Check that logos and images haven't mysteriously shifted.
- Colour Check: Your screen won't be a perfect match to the final print, but you should still look for any glaring colour shifts. This is where setting your file up in CMYK from the start really pays dividends.
- The Critical Details: Double and triple-check all contact info. A single wrong digit in a phone number or a typo in a web address can make your print useless.
Take your time with the proof. Rushing this step is one of the most common and costly mistakes we see. Once you give it the thumbs-up, any errors in the content are on you. A careful five-minute check now can save you a world of headaches later.
Placing Your Order and Hitting Your Deadline
Proof approved? Brilliant. Now you're ready to place the order. This is where practical things like production and delivery times come into play. Most professional printers, including us, are upfront about their timelines. A standard A1 poster, for instance, can often be printed and dispatched within 24-48 hours.
But remember, that's production time. You always need to add delivery time on top. If you've got a hard deadline for an event, tell your printer right at the start. Good communication can solve a lot of problems, but it’s always smart to build in an extra day or two for any courier surprises. Knowing exactly where to get a poster printed with a reliable turnaround is a huge advantage, especially when you're under pressure. For more on that, check out our guide on finding dependable poster printing services.
The UK's large format printing scene is booming. For businesses specialising in A1 and larger prints, recent figures show an average sales growth of 6.7% among the top players, easily outpacing the rest of the industry. The printers who are succeeding are the ones focusing on the fast, custom jobs that businesses and event planners rely on, which you can read more about in the UK printing industry performance report on IBISWorld. By nailing these final checks, you’re not just getting a great print—you’re tapping into a system built for quality and speed.
Real-World Scenarios for Your A1 Prints
It's one thing to talk about specs and dimensions, but where does an A1 print actually fit in the real world? Its true power comes from matching its impressive size to the perfect application. Let's move past the theory and look at where this format really makes a difference.
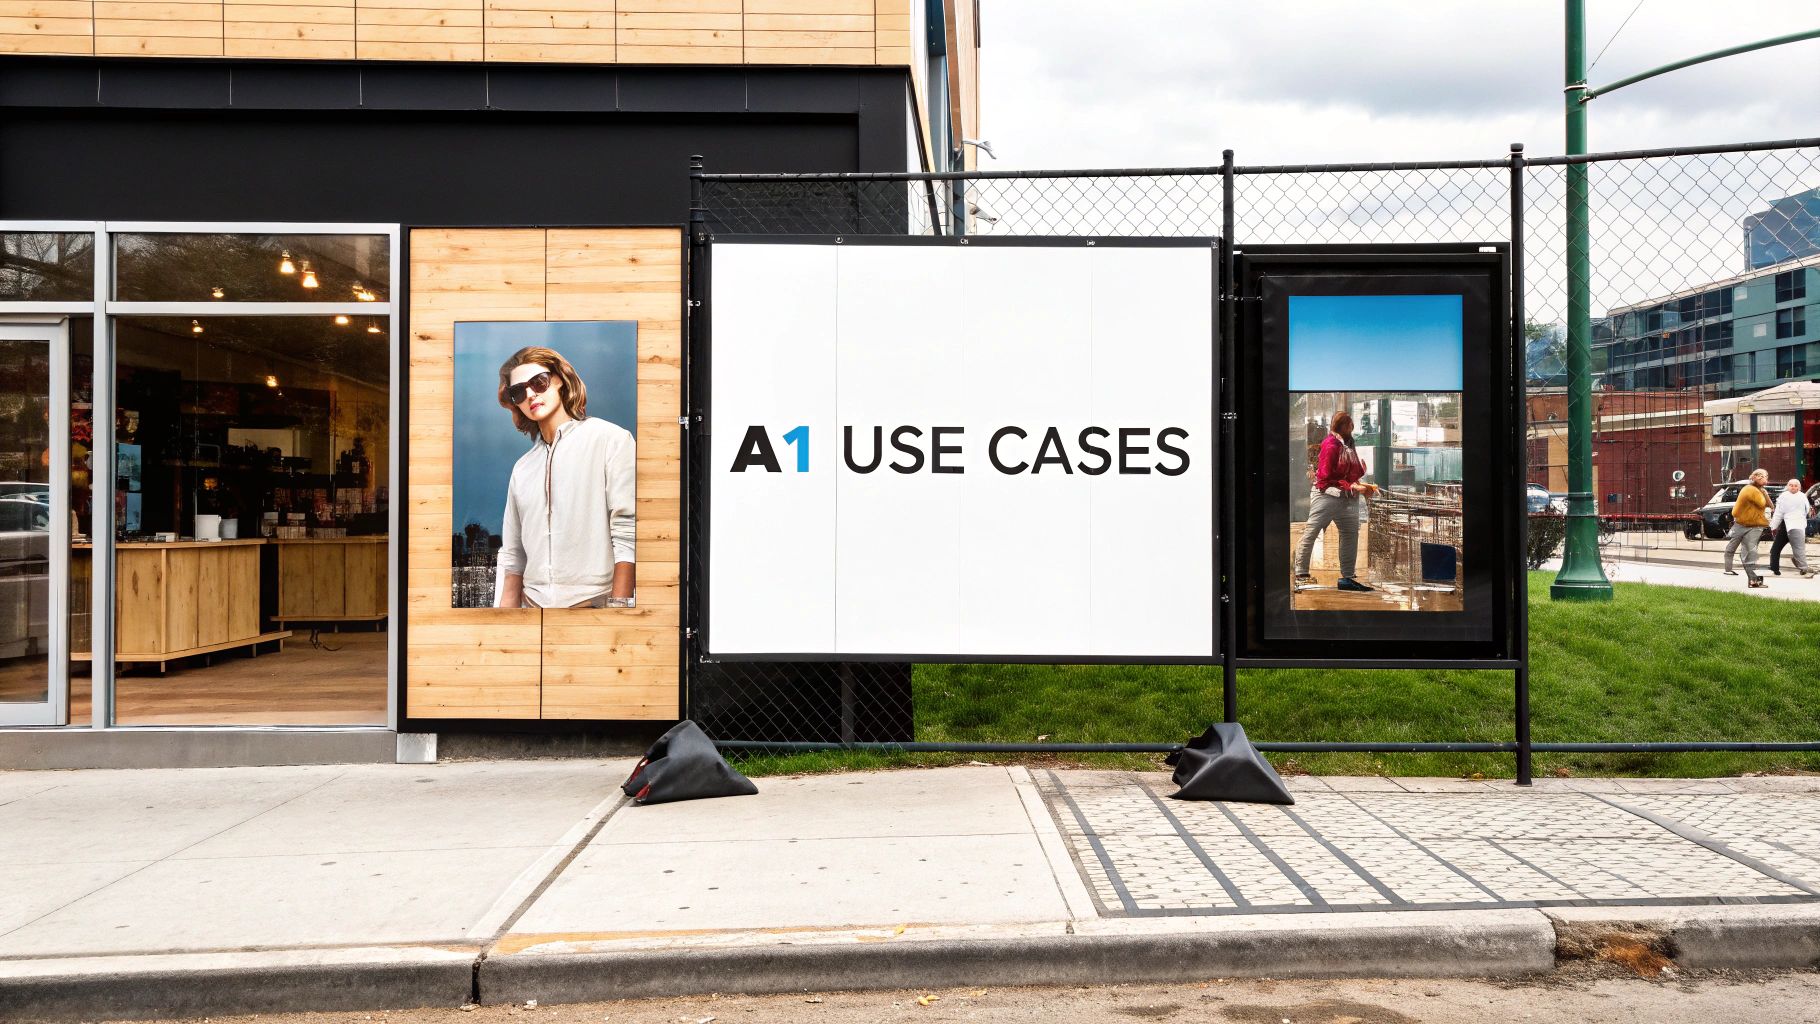
For a busy marketing agency, A1 prints are the absolute workhorse. Think about it: they're big enough to show off detailed campaign mock-ups in a client presentation, but still perfectly sized for pop-up displays that need to grab attention in a packed exhibition hall.
Retailers get it, too. An A1 poster can completely transform a shop front, announcing a new collection or a can't-miss sale. Inside, they work brilliantly as promotional signs to guide customers, catching their eye without cluttering up the space.
Industry-Specific A1 Applications
Different industries have completely different needs, and the A1 format is surprisingly good at meeting them. Take a construction firm, where safety and branding go hand-in-hand. A tough A1 sign, printed on weatherproof vinyl, is perfect for displaying critical safety info or slapping a logo on site fencing. It’s large enough to be read from a distance, so vital messages never get missed.
This kind of practical use is why the UK's large-format printing market keeps growing. Demand for A1 prints (594 x 841 mm) is especially high for construction site wraps, retail promos, and trade show displays. If you're interested in the numbers, the large-format printer market report shows just how much these trends are driving demand.
Your A1 print is a visual problem-solver. Whether you need to direct foot traffic, communicate safety rules, or celebrate a big moment, its size strikes the ideal balance of visibility and versatility for almost any environment.
A1 Prints for Personal Events
It’s not all about business, though. A1 prints bring a professional, polished feel to personal events that makes all the difference.
Imagine a beautifully designed wedding seating chart, printed in A1—it instantly becomes an elegant centrepiece at the reception. For a landmark birthday or anniversary, a collage of photos printed in large format creates a stunning, heartfelt display that guests will gather around and talk about all night.
By thinking creatively about how and where to use them, you can make sure your A1 print gets seen, makes an impact, and is remembered long after the event is over.
Common A1 Printing Questions Answered
Even the most carefully planned project can hit a last-minute snag. Before you press the "order" button, a few common questions always seem to pop up. We get it. Getting these details right is the difference between a good print and a great one.
Here are the answers to the questions we hear most often, designed to clear up any final doubts and get your A1 project over the finish line.
What Are the Exact A1 Dimensions in MM, Pixels, and Inches?
Getting the size right from the very start is non-negotiable. While you might see measurements in different units, professional printers in the UK work exclusively in millimetres based on the official ISO 216 standard.
Here are the numbers you need to lock in:
- Millimetres: The official A1 size is 594mm x 841mm. Set your canvas to this exact dimension in your design software.
- Inches: For reference, this is about 23.4 x 33.1 inches. It’s a handy conversion to know, but always design and supply your artwork in mm.
- Pixels (for Print Quality): To get that crisp, professional finish at 300 DPI (dots per inch), your artwork's resolution needs to be 7016 x 9933 pixels.
Starting with a canvas at these pixel dimensions ensures your design is perfectly scaled. It prevents any nasty surprises like blurriness or pixelation when it comes time to print.
Can I Just Enlarge an A4 File to A1 Size?
Technically, you can scale up a smaller file, but we’d strongly advise against it if you're after a professional result. An A4 document simply doesn't have enough visual data to look sharp when blown up to eight times its original area for an A1 print.
When you force software to enlarge a small file, it has to invent new pixels to fill the gaps. This process, called interpolation, almost always leads to a soft, fuzzy-looking print with blurry text. Think of it like trying to stretch a passport photo into a movie poster—all the fine detail just isn't there to begin with.
The golden rule is to always create your artwork at the final A1 size from the very beginning. Use high-resolution images (300 DPI) and vector graphics wherever possible to guarantee every line and letter stays perfectly sharp.
If you’re stuck with an A4 file, send it over. Our team can assess it and let you know if a professional recreation for large-format printing is possible.
Which File Format Should I Use for A1 Printing?
For consistent, reliable, and professional-grade results, a press-quality PDF is always the best choice. It has been the industry standard for years, and for good reason.
A PDF acts like a locked, self-contained box for your design. It embeds all your fonts, images, and graphics into a single file, which means nothing will shift, change, or go missing when we open it on our end. While other formats like high-resolution JPEGs or TIFFs are sometimes acceptable, a PDF is the gold standard for preserving your layout and colour accuracy.
Whichever format you choose, make sure you save it in the CMYK colour mode. This ensures the colours you see on your screen are as close as possible to what will come off the press.
Ready to bring your A1 vision to life with vibrant colours and a professional finish? The team at Banner Printing Ltd is here to help you every step of the way, with fast turnaround and free UK delivery on all orders.


