Before you even think about tackling that stubborn sticker residue, the first move is to get your gear in order. Having a simple toolkit ready means you can handle whatever sticky mess you’re facing without accidentally damaging the glass. A little prep work saves you from scrambling later and helps you pick the right tool for the job.
Your Essential Toolkit for a Flawless Finish
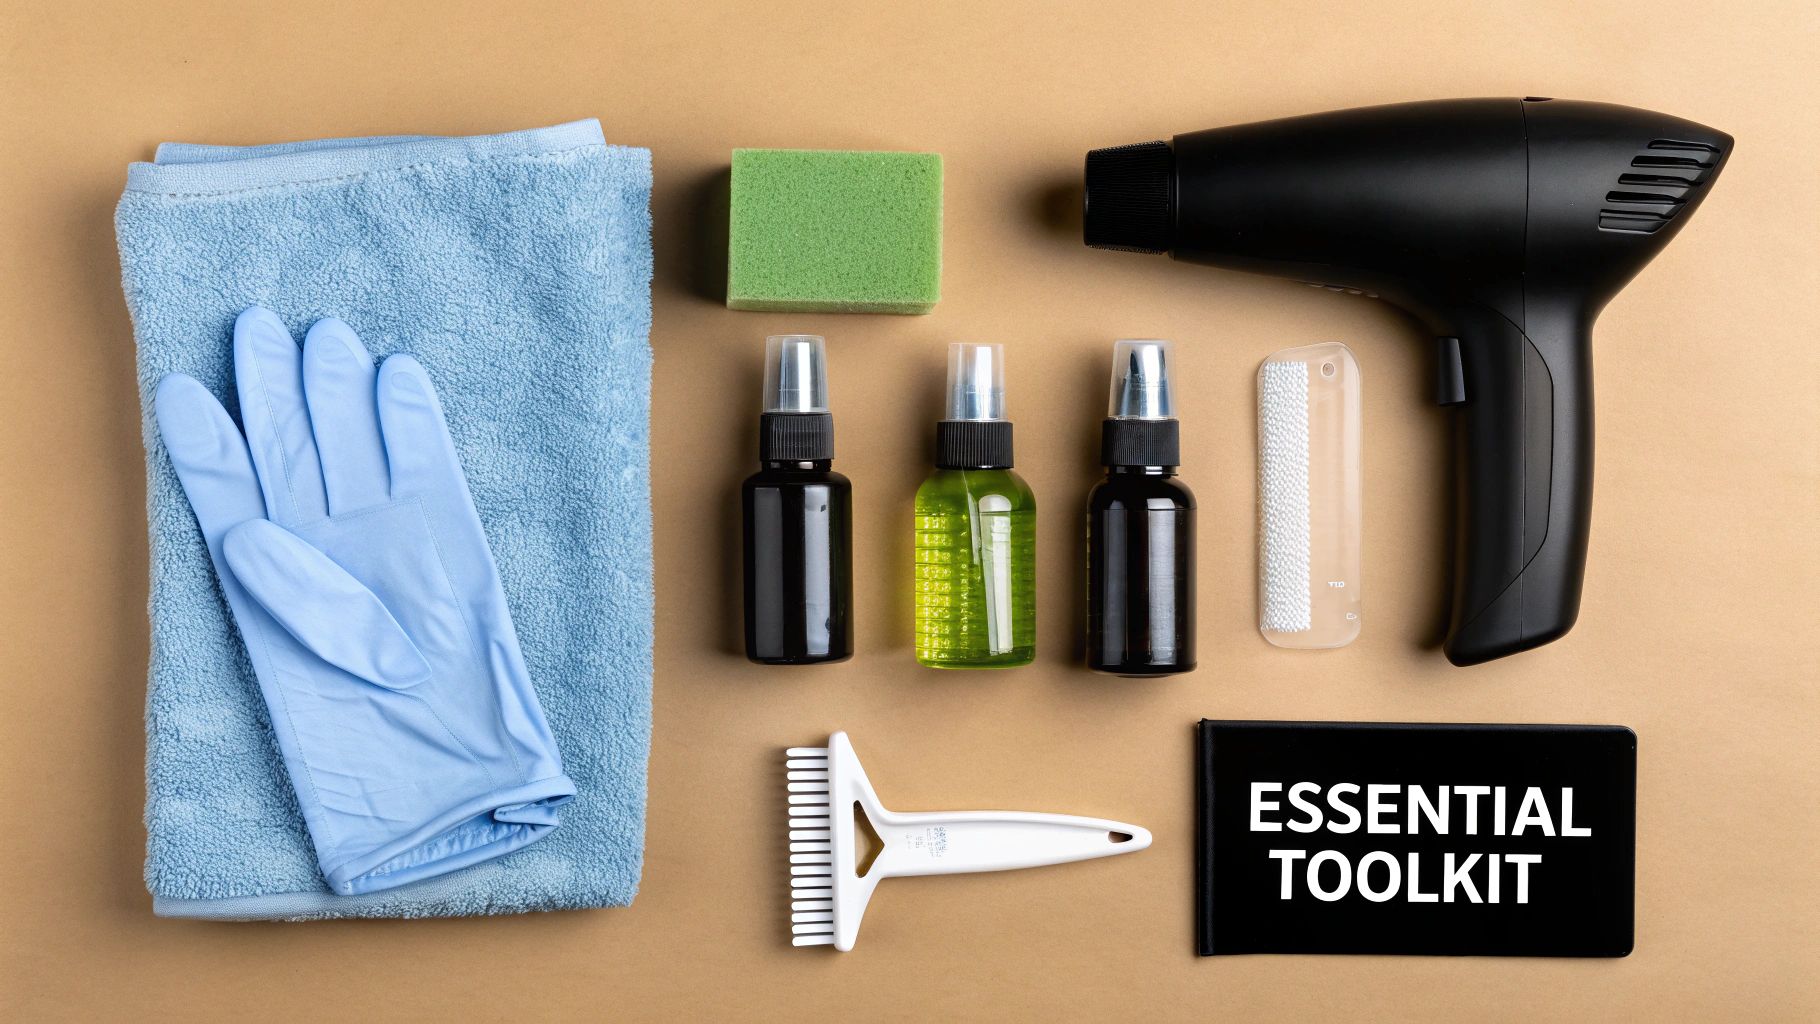
The secret to getting sticker residue off glass cleanly often comes down to what you have on hand. It's tempting to reach for the strongest chemical you can find, but it’s always best to start gentle and only bring out the heavy hitters if you really need to. This approach is safer for you and for the surface you’re working on.
Think of your kit in three parts: tools for applying and scraping, gentle removers you probably already own, and stronger solutions for when things get serious.
Essential Cleaning and Scraping Tools
A good toolkit doesn’t need to be fancy. You just need a few reliable items that will get the job done without leaving scratches or marks behind.
- Microfibre Cloths: These are a must-have. Their soft texture is perfect for applying liquids and wiping away gunk without leaving lint or scratching the surface.
- Plastic Scraper or Old Credit Card: Always try plastic before you even consider metal. It's firm enough to get under softened adhesive but won’t gouge the glass.
- Safety Razor Blade: This is your last resort for properly baked-on residue on untreated glass. Make sure it’s a fresh, sharp blade and always hold it at a very low angle to the glass.
- Protective Gloves: An absolute essential. If you’re using any kind of solvent, you need to protect your skin from irritation.
Gentle and Household Solutions
You might be surprised to learn that some of the best residue removers are probably sitting in your kitchen cupboards right now. These are brilliant starting points for most common sticky situations.
- Olive Oil or Cooking Oil: Works wonders by breaking down the chemical structure of the adhesive.
- White Vinegar: The mild acid in vinegar is surprisingly effective at dissolving that sticky film.
- Warm Soapy Water: Never underestimate the basics. A good soak with soapy water can loosen up less stubborn glues just fine.
The professional cleaning industry has this stuff down to a science, and many of their methods work just as well at home or in the office. In 2023, the UK's cleaning sector employed around 1.47 million people, all relying on proven techniques for jobs like this. They blend everyday staples with professional-grade tools to get the job done right. You can find out more about the UK cleaning industry's scale and practices from PolicyBee.
Everyday Household Solutions That Really Work
Before you reach for the heavy-duty chemicals, have a rummage through your kitchen cupboards. You might be surprised to find that some of the best tools for getting sticker residue off glass are things you already own. These are my go-to methods for everyday sticky messes on jars or mirrors, and they work without any harsh fumes.
These simple tricks are the perfect place to start. They’re gentle on most glass surfaces but surprisingly tough on the common adhesives used for product labels and price tags. Best of all, they’ll save you a trip to the shops.
The Oil-Based Method for Sticky Labels
One of the oldest and most reliable tricks in the book is using a bit of cooking oil. Olive, vegetable, sunflower—it doesn't matter. The oil gets right into the adhesive, breaking it down and loosening its grip on the glass, making the whole sticky mess a breeze to wipe away.
This is my preferred technique for standard paper labels, and it rarely lets me down.
- Apply a generous layer. Don’t be shy here. Use a paper towel or your fingers to completely cover the residue.
- Let it soak. Patience is your friend. Give the oil at least 15-20 minutes to do its thing. For really stubborn, dried-on gunk, I've left it for an hour or more.
- Wipe and clean. After soaking, the adhesive should have softened enough to wipe away with a clean cloth. You’ll find it clumps together and lifts off without much of a fight.
Pro Tip: For a less messy option on vertical surfaces, try peanut butter. The oils work just like cooking oil, but its thicker texture stops it from dripping down a shop window or a glass door.
Once the gunk is gone, you'll have an oily film left over. A quick spray with a standard glass cleaner or a wipe with warm, soapy water will cut right through it, leaving your glass crystal clear.
Using White Vinegar to Dissolve Residue
Another kitchen hero is plain old white vinegar. Its mild acidity is brilliant for dissolving that tacky, almost invisible film left behind after you’ve peeled a label off. It’s perfect for tackling that faint outline that just won’t budge.
The method is simple: soak a microfibre cloth in white vinegar, press it firmly over the sticky patch, and hold it there for a few minutes. This gives the acid time to break down the adhesive. Once it’s softened, just wipe it away in small, circular motions.
If you're dealing with a larger area, like cleaning old promotional stickers off a storefront, a spray bottle with a 50/50 mix of white vinegar and warm water works wonders. It's also a great way to prep the glass before putting up new signage. And if you are looking for top-notch replacements, it's worth checking out options for custom weatherproof window stickers for glass surfaces.
Just like with the oil method, finish up with a proper glass cleaner to get rid of any lingering vinegar smell and guarantee a flawless, streak-free shine. Your glass will look good as new.
Stepping Up to Solvents for Stubborn Residue
So, the gentler methods haven’t made a dent in that tacky, persistent film. It’s time to bring in the bigger guns. We’re talking about the stubborn, semi-transparent glue left behind by old factory labels, duct tape, or long-forgotten shop window decals. This is where solvents like isopropyl (rubbing) alcohol and acetone really prove their worth, as they are specifically designed to dissolve adhesive bonds that household remedies just can’t touch.
Before you start, let's talk safety. These are strong chemicals that demand respect. Always wear gloves to protect your skin from irritation and make sure you’re working in a well-ventilated space to avoid breathing in the fumes. Even just cracking a window or using a small fan can make all the difference.
Choosing Your Solvent and Testing First
The two most common and effective solvents you’ll find are isopropyl alcohol and acetone, which is the main ingredient in most nail polish removers. Alcohol is a fantastic all-rounder and is generally less harsh. Acetone is more aggressive and works much faster on tough adhesives, but you need to be a bit more careful with it.
The most crucial step I never skip is the spot test. Dab a tiny amount of your chosen solvent onto an inconspicuous corner of the glass with a cotton bud. This is especially important for tinted, frosted, or specially coated glass, as aggressive solvents can potentially damage these finishes. Wait a few minutes to check for any strange reactions before you go all in.
Deciding where to start can feel a bit tricky, but this simple flowchart can help guide you through the process, making sure you use the right tool for the job.
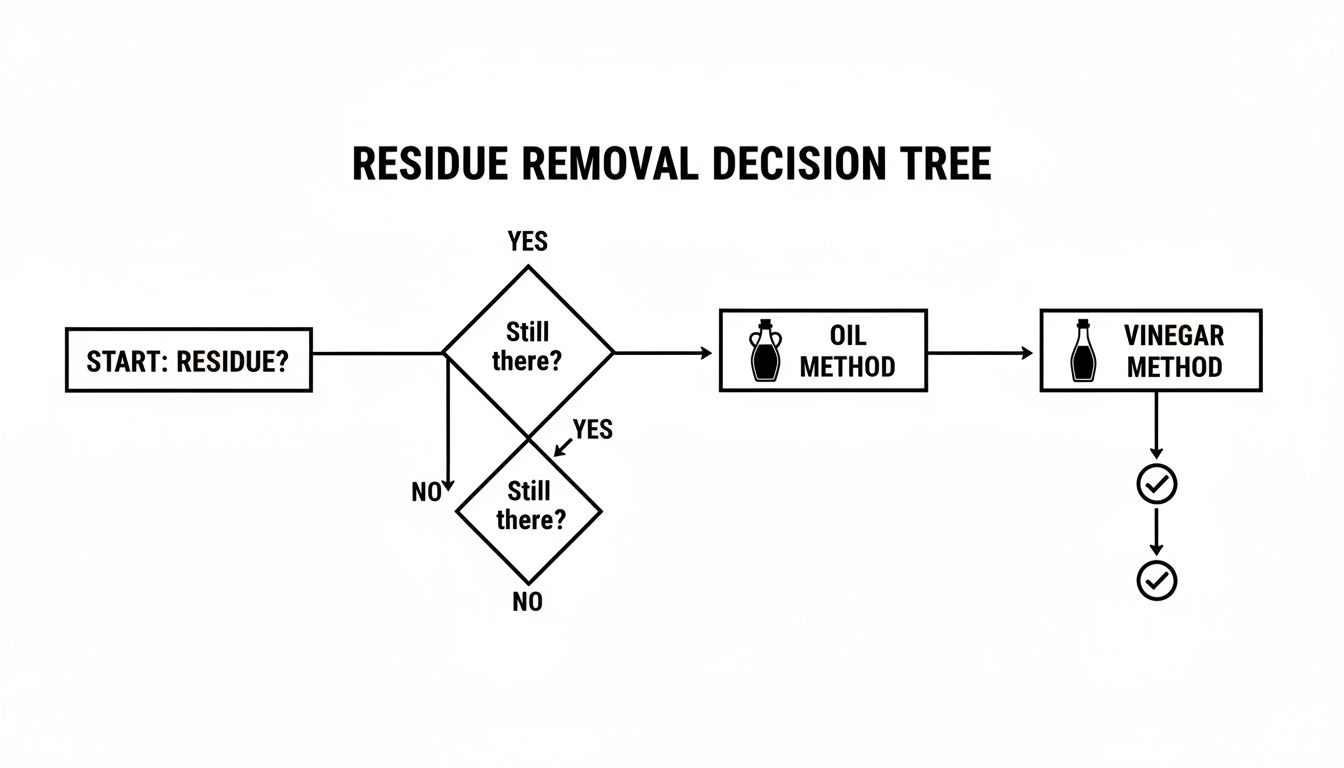
As the visual guide shows, it's always best to start with the mildest effective method and only move up to stronger solutions when necessary. It's the safest way to get great results.
For a clearer picture, this table breaks down the most common solvents you're likely to use.
Comparison of Common Solvents for Residue Removal
| Solvent Type | Effectiveness | Key Safety Precaution | Best For |
|---|---|---|---|
| Isopropyl Alcohol (70%+) | Good | Work in a ventilated area; wear gloves. | General-purpose residue, vinyl decal glue, everyday labels. |
| Acetone (Nail Polish Remover) | Excellent | Highly flammable; requires excellent ventilation. | Heavy-duty adhesives, super glue, old, hardened residue. |
| Methylated Spirits | Very Good | Flammable; avoid prolonged skin contact. | Stubborn sticker glue, marker pen, some paint residue. |
| White Spirit | Good | Strong fumes; ensure good airflow. | Greasy or oily residues, tar, wax-based adhesives. |
Ultimately, choosing the right solvent comes down to balancing effectiveness with safety for both you and the surface you're working on.
The Application Process for a Perfect Finish
Once your spot test comes back clear, the actual process is pretty straightforward. Soak a corner of a microfibre cloth or a sturdy paper towel in the solvent. You want it damp, not dripping, so you can control where it goes.
Press the damp cloth firmly onto the residue and hold it there for a minute or two. This gives the solvent time to work its magic, penetrating and dissolving the adhesive.
After letting it soak, start wiping in firm, circular motions. You should feel the gunk starting to break down and lift away. Keep applying more solvent to your cloth as needed until all the tackiness is gone. For any particularly stubborn spots, a plastic scraper can help lift the softened residue without scratching the glass.
The demand for effective cleaning agents is massive. The UK glass cleaner market was valued at USD 225.6 million in 2024, showing just how much businesses and homeowners need products that can tackle tough jobs like sticker adhesive. With 74.11% of sales happening in physical shops, it's clear people are actively looking for reliable, hands-on solutions.
To finish, clean the entire glass surface with your usual glass cleaner. This removes any lingering solvent film and leaves you with a professional, streak-free shine. Once you master this, you'll have the confidence to tackle other tricky jobs—for instance, learning how to remove spray paint from glass uses very similar principles.
And for your next project, why not skip the future hassle? Consider using high-quality removable decals that are designed to peel off cleanly without leaving a mess behind in the first place.
Mechanical Methods for Baked-On Adhesive
Sometimes, solvents and oils just won't cut it. You’re left with that rock-hard, fossilised adhesive that’s been baked onto a car windscreen or a shop window for years. This is where you switch from chemical persuasion to a more hands-on, physical approach.
When you're dealing with the really tough stuff, looking at professional techniques for removing stubborn substances from glass can give you some great pointers. These mechanical methods need a steady hand, but get them right, and the results are fantastic.
This is all in a day's work for the pros. The UK's window-cleaning industry, a sector with a market size of £470.9m in 2024, tackles everything from ancient promotional stickers to leftover builders’ film. They rely on these tried-and-tested mechanical methods to get glass back to its pristine, clear state.
Using a Razor Blade Safely
The idea of taking a razor blade to glass can sound a bit nerve-wracking, but it’s a standard pro technique when done with care. The key isn't brute force; it’s finesse.
First, and this is the golden rule: never scrape on dry glass. Always lubricate the surface generously. A good spray of soapy water or your go-to glass cleaner does the trick, helping the blade glide smoothly instead of digging in and scratching.
Grab a new, sharp, single-edge razor blade, preferably in a proper holder for safety and control. Hold the scraper at a very low, shallow angle—think 30 degrees or less. You want to get under the adhesive to lift it, not gouge the glass itself.
Apply gentle, even pressure and push the blade away from you in short, controlled strokes. You’ll quickly see that stubborn residue start to peel up in satisfying little strips.
The Gentle Power of Heat
For adhesive that’s gone brittle with age, a bit of heat can be your secret weapon. You don't need anything fancy; a simple hairdryer is often all it takes to soften that ancient glue, making it pliable and much easier to shift. Heat gets the molecules in the adhesive moving, weakening its death grip on the glass.
Just set your hairdryer to a medium or high setting and hold it about 15-20 centimetres away from the residue. The trick is to keep it moving in a slow, sweeping motion over the whole area.
Crucial Safety Note: Never focus the heat on one spot for too long. Heating glass too quickly or unevenly can cause thermal shock, which might lead to a crack. Keep that hairdryer moving to warm the area gradually.
After a minute or two, test a corner with a plastic scraper or even your fingernail. The adhesive should feel much softer and tackier. Once it's pliable, you can often peel off large sections at once or scrape away the softened gunk with minimal effort. This one-two punch of heat followed by scraping is a game-changer for the most stubborn jobs.
Troubleshooting Lingering Haze and Scratches
You've done the hard part—the sticker is gone and the sticky residue is history. But then you catch the light just right and see it: a ghostly haze or the faint outline of the old sticker. It’s a frustrating final hurdle, but thankfully, it's usually an easy fix. More often than not, it's just a microscopic film of adhesive or cleaner left behind.
Before reaching for anything aggressive, give it a second clean with something gentle. A bit of warm water with a single drop of washing-up liquid is often all it takes. Use a fresh microfibre cloth and work in circular motions, then grab another completely clean, dry cloth to buff it for a streak-free shine.
Still seeing a faint film? The next step is a simple 50/50 mix of white vinegar and water. The mild acid in the vinegar is fantastic at cutting through those last stubborn bits of residue without harming the glass.
Preventing and Polishing Out Minor Scratches
Nothing's more disheartening than finishing the job only to find fine scratches on the glass. This almost always comes down to using the wrong tools or accidentally trapping a bit of grit. Never, ever use steel wool, scouring pads, or any abrasive powders on glass. You will absolutely leave permanent marks.
Even something as innocent as a cloth can cause damage if a tiny piece of grit gets caught in its fibres. My advice is to always use clean, high-quality microfibre cloths. And before you start scraping, give your tool a quick inspection to make sure it's free of nicks or embedded dirt.
The golden rule for preventing scratches is simple: lubrication and the right tools. A dry scraper on dry glass is just asking for trouble. Always keep the surface wet so the tool can glide smoothly instead of grinding.
If you do spot a few very light scuffs, don't panic. You can sometimes polish them out yourself. Try a small amount of non-gel toothpaste (the classic white paste stuff) on a soft cloth. Rub it in small circles to gently buff the mark away. A paste made from baking soda and water works well, too. Just be sure to clean the area thoroughly when you're done. For anything deeper, you may need to call in a professional for glass polishing.
Handling Special Glass Surfaces
It’s crucial to remember that not all glass is the same. Tinted windows, frosted glass, and mirrors all need a more delicate touch to avoid causing irreversible damage.
- Tinted Windows: Be extra careful here. Aggressive solvents like acetone can eat away at the tinting film. Stick to mild soapy water or a small amount of isopropyl alcohol on a cloth. A metal razor is a definite no-go.
- Frosted or Etched Glass: The textured surface on this type of glass is a magnet for adhesive residue. Scraping can ruin the finish, so instead, use a solvent and a soft brush—an old toothbrush is perfect—to gently work the gunk out of the texture.
- Coated or Mirrored Surfaces: These surfaces have delicate coatings. When you're working on a mirror, make sure no liquid seeps around the edges. Over time, moisture can get behind the glass and damage the reflective silvering.
For businesses that are constantly updating signage, thinking ahead can save a lot of headaches. Choosing the right material from the start makes a huge difference. Exploring durable and easy-to-clean options like different types of plastic for signs can be a great alternative for some applications, making future changeovers much simpler.
Common Questions on Sticker Residue Removal
Even with the best advice, you'll still run into tricky situations when you’re elbow-deep in sticker residue. It's perfectly normal to wonder if you’re using the right tool for the job or if a particular product is safe for your surface. Let’s tackle some of the most common questions that pop up.
Think of this as your quick-fire troubleshooting guide. These are the real-world problems we hear about all the time, from tackling a simple jar label to getting that stubborn, sun-baked decal off a shop window.
Can I Use WD-40 on Glass?
Absolutely. WD-40 is a surprisingly effective tool for this job. Its oil-based formula is brilliant at dissolving stubborn adhesives, penetrating the sticky mess and making it much easier to wipe away.
Just spray a small amount directly onto the residue and let it sit for a few minutes. Give it time to work its magic. Then, grab a clean microfibre cloth and wipe the gunk clean. The crucial final step? Clean the area with a standard glass cleaner. This removes the oily film WD-40 leaves behind, which will otherwise attract dust and cause streaks.
What Is Best for Old Baked-On Residue on a Car Window?
For that frustrating, rock-hard residue on a car window, you need a combination approach. Adhesive that's been baked on by the sun requires a little more persuasion.
Start by gently warming the area with a hairdryer on its lowest setting to soften the glue. Next, use a plastic razor blade to carefully scrape away the bulk of it. It is vital you avoid metal blades on car windows, as they can easily damage window tint or the delicate defroster lines on the rear screen. Once the worst is gone, use a citrus-based remover or isopropyl alcohol on a cloth to dissolve what’s left.
Remember, patience is key here. Rushing the job with aggressive scraping is what causes damage. Take your time and let the heat and solvents do the heavy lifting for you.
This multi-step process gets the residue off completely without harming your vehicle's glass.
How Do I Remove Residue Without Leaving Scratches?
The secret to a scratch-free finish comes down to two simple things: lubrication and the right tools. Never, ever scrape a dry glass surface. It’s the single biggest mistake people make and the fastest way to cause permanent scratches.
Always wet the glass first. Soapy water or a good glass cleaner creates a slick surface for your tool to glide over. Always start with the gentlest tool first, like a plastic scraper or even an old credit card.
If you absolutely have to use a metal razor blade (on non-automotive glass only), stick to these rules:
- Use a brand-new, sharp blade designed for glass scraping. A dull one will drag and scratch.
- Keep the surface thoroughly lubricated while you work. Re-spray if you need to.
- Hold the blade at a very low, shallow angle against the glass.
Finally, only use clean, soft microfibre cloths for wiping. A dirty rag can trap tiny bits of grit that will cause fine swirl marks on the surface.
At Banner Printing Ltd, we know how vital a clean, professional appearance is for your business. For your next promotion, consider our high-quality, easy-to-apply signage that leaves no mess behind. Explore our options at https://bannerprintingltd.co.uk.


